Can You See Mt Rainier in One Day? (Itinerary & Best Stops)

Looking for things to do at Mount Rainier in one day?
I planned a mid-July day trip to the park’s Paradise area to share my favorite place with my family. After exploring, most headed home, but my mom and I stayed the night in Ashford. The next morning, we drove nearly two hours to reach Sunrise.
That trip taught me something key—if you only have one day, pick one area and stick with it.
While you won’t see all of Mount Rainier National Park, you’ll experience the expansive mountain views that make it unforgettable.
If you’re wondering which visitor area is right for you, keep reading for my one-day itinerary options, including insider tips to help you plan your perfect trip.
Let’s go!
Trip Planning Tip!
Stay the night in Ashford to get an early start in Paradise.

Quick Guide: Mt Rainier in One Day Trip Planning
- Visitor Areas: Longmire, Paradise, Ohanapecosh, Sunrise, Carbon River (closed)
- Open Year-Round: Longmire & Paradise
- Best for First-Timers: Paradise
- Best Entrances for a Day Trip: Nisqually (Paradise & Longmire), White River (Sunrise)
- Passes Required: National Park Pass. Timed Entry reservations are not required in 2026.
- Drive Time from Seattle: ~2 – 2.5 hours depending on traffic and destination
- Check the Forecast: Visit on a clear day for the best mountain views.
Best Time to Visit Mount Rainier
Rainier’s prime hiking season runs from July through October, when most subalpine trails are snow-free, and the weather’s usually clear.
Mid-July to mid-August is my favorite for wildflower meadows in full bloom. I also love early fall visits to see fiery colors with fewer crowds.
Check out my seasonal guide to Mount Rainier for a full breakdown of what to expect year-round.
Is a day trip to Mount Rainier worth it?
Yes! In just one day, you can see the best of what this national park offers: jaw-dropping mountain views, world-class hiking trails, wildflowers (mid-July to early August), stunning waterfalls, and old-growth forests.
Follow the Mount Rainier 1-day itinerary I did with my family below to see it all.
Paradise vs Sunrise: Which Area Should You Visit?
If you’re planning how to visit Mount Rainier, know this: you can’t visit both Paradise and Sunrise in one day without rushing or excessive driving. The good news is you don’t need to.
Both areas are spectacular, but if this is your first visit, Paradise is the clear winner.
It offers the most amenities, a trail system throughout the renowned Paradise meadows that caters to all skill levels, and plenty of worthwhile stops that appeal to both hikers and non-hikers alike.
Since you’ll drive past the Longmire area to get to Paradise, you can easily stop in Longmire for short hikes through old-growth forest on your way out of the park—a nice reprieve from the summer heat!


get clarity & confidence
Stop second-guessing your itinerary.
Let’s build a custom trip that gets you the most from your time and money.
Paradise: Best Overall for First-Time Visitors
I fell in love with Paradise at Mount Rainier on my first trip. I saw fields of avalanche lilies in bloom, a marmot basking in the sun, and breathtaking mountain and volcano views from Panorama Point on the Skyline Trail, the park’s most popular hike.
The Paradise and Longmire areas also feature easy-to-access waterfalls, no strenuous hiking required.
- Closest entrance: Nisqually Entrance near Ashford
- Best for: First-time visitors, families, scenic viewpoints, classic hikes, waterfalls, wildflowers (mid-July through early August), and quick, rewarding stops
- Why choose Paradise: It’s the park’s most developed area with a state-of-the-art visitor center, a historic inn, multiple spots to grab food, restrooms, and indoor spaces to cool down or relax. Paved trails and easy viewpoints make it accessible, but experienced hikers will also find plenty to fill a full day, like the bucket list Camp Muir hike.
Paradise Attractions
Paradise is the heart of Mount Rainier National Park and delivers everything the park is famous for.
- Skyline Loop Trail (hard) or Skyline Trail to Myrtle Falls (easy): Iconic views of Rainier behind a 60-foot waterfall and family-friendly trail system.
- Alta Vista Trail (easy to moderate) or continue to Glacier Vista (moderate): Perfect for those who want in-your-face mountain and glacier views without committing to the Skyline Loop.
- Reflection Lakes: Classic photo stop with Rainier’s reflection when the water is still.
- Narada Falls: One of the park’s most beautiful waterfalls.
- Inspiration Point: Scenic pullout with impressive Rainier and valley views.
- Christine Falls: Easy roadside stop to see the falls framed by a historic stone bridge
- Longmire: Historic district with easy hikes through old-growth forest and the National Park Inn.

Sunrise: Best for Fewer Crowds & Hiking Focused Visits
Sunrise is the highest point you can drive to in Mount Rainier National Park at 6,400 feet above sea level.
While Sunrise has fewer eating and sitting facilities than Paradise, the fact that less visitors come here is an attractive draw.
Keep in mind, the season here is shorter, typically from July through September, with exact dates varying each year.
- Closest entrance: White River Entrance near Packwood or Greenwater
- Best for: Return visitors, experienced hikers, wildflowers (mid-July through early August), wide-open fields and vistas, and fewer crowds
- Why choose Sunrise: Come here to see Rainier glowing pink at sunrise and for unbeatable alpine views and dramatic ridgelines. Sunrise offers the chance to see climbers on their way to the summit from Second Burroughs and is an excellent choice if you’re seeking hikes with a big payoff for views or photography.
Sunrise Attractions
Sunrise is best suited for those focused on hitting the trails and tackling longer hikes without the need for indoor spaces to lounge.
- Sunrise Point Lookout: A roadside stop with ample parking just before the visitor center with panoramic views, including Mount Adams.
- Sunrise Nature Trail (easy to moderate): Arguably the highest reward-to-effort hike in the entire park.
- Sunrise Rim Trail to Glacier Overlook (moderate): Standout views of Rainier and the White River Valley, including a gem-colored lake at the bottom of the valley.
- Second Burroughs (hard): Challenging but rewarding hike through tundra-like terrain leading to the best view of Mount Rainier, in my opinion.
- Mount Fremont Lookout (moderate to hard): Strenuous but epic 6-mile hike to a historic fire lookout. Amazing at sunrise or sunset.
- Eastside Trail (easy to moderate): A hidden gem if you’re looking to beat the summer heat—this shady trail features three waterfalls.
- Tipsoo Lake: A delightful alpine lake surrounded by wildflowers from mid-July to early August.

What not to miss in Mount Rainier National Park?
The #1 reason people visit Mount Rainier is the in-your-face mountain views surrounded by breathtaking alpine landscapes. You’ll get that in just one day if the weather is clear. And if you take the time to soak it all in, you’ll leave feeling like you had a complete experience.
Keep reading for my favorite spots where the Mountain truly steals the show.
Paradise 1-Day Itinerary
Here’s the relaxed one-day itinerary I followed with my family, including my 70-year-old parents.
They’re active but not used to elevation or long hikes, so this route balances easy walks, iconic views, waterfalls, and lots of stops to see the best Mount Rainier attractions.
But if you’re an avid hiker like me, I’ve added options for challenging hikes with more mileage.
Morning
7:30 AM Arrive at Nisqually Entrance
Many visitors don’t realize it’s another 30-minute drive from the Nisqually Entrance to the Henry M. Jackson Visitor Center at Paradise. Plan your timing and bathroom breaks accordingly on your drive in.
8:00 AM Arrive at Parking Lot
Before you reach the visitor center, you’ll pass the second (lower) parking lot on your left. If it’s already filling up, don’t waste time circling the upper lot, especially if a line of cars is behind you.
There’s also a third parking lot, and when all lots fill, cars start parking along Paradise Road.
Before hitting the trail, pop inside Paradise Inn. It’s worth a quick stop to check out the historic interior, use the restrooms, and grab a coffee or a snack from Tatoosh Café if you need it.

8:30 AM Skyline Trail to Myrtle Falls (30 – 40 mins)
Start your day here early to capture photos of Edith Creek and Myrtle Falls, one of the park’s most photographed spots, while the trail is quiet.
Crowds only get bigger as the day progresses.
The easy, paved trail leads to a spur trail, where you’ll walk down to see the iconic view of Myrtle Falls with Mount Rainier rising out of the landscape in the background.
You’ll backtrack to the Alta Vista Trail, the next hike on this itinerary. But on the way in, you’re hiking toward the Mountain. On the way back, you’ll face the Tatoosh Range, getting two totally different views for minimal effort.
- OPTION #1: Keep walking past Edith Creek to explore more of Paradise’s rolling meadows. You’ll find some of the best wildflower displays here in peak season.
- OPTION #2: Continue to hike the Skyline Loop Trail and skip the Alta Vista Trail. It’s Rainier’s most popular trail for good reason. Plan for 4-5 hours, allowing yourself time to soak in the high-elevation views.

Plentiful signs mark Paradise’s intersecting trails, but bring a map to help you navigate.
9:10 AM Alta Vista Trail (60 – 70 mins)
This easy-to-moderate loop features Paradise’s gorgeous meadows and more incredible Rainier views. White avalanche lilies and bright pink mountain heather lined the trails on our visit.
While the trail is paved and suitable for families, kids, and active seniors, you’ll climb 500 feet of elevation. Steep climbing is unavoidable on Paradise trails, but you can take it slow.
- OPTION: Continue up to Glacier Vista. It’s a harder hike with nearly 1,000 feet of elevation gain, but the reward is worth it—up-close views of the Nisqually Glacier and Mount Rainier.
10:20 AM Photo at Muir Steps
By mid-morning, you should still have a good chance to capture a photo at the Muir Steps without a crowd.
This classic Paradise photo spot features John Muir’s famous words etched into stone:
“…the most luxuriant and the most extravagantly beautiful of all the alpine gardens I ever beheld in all my mountain-top wanderings.”

10:30 AM Henry M Jackson Visitor Center (Exhibits, Theater, Gift Shop)
By this point, my parents were ready for a break, and I was getting hungry.
The highly sophisticated visitor center is the perfect stop to rest, eat a snack, and learn more about the park.
Inside, you’ll find comfortable couches where visitors take a break from the sun and trails. We did the same before wandering through the upstairs exhibits, learning about the life cycle of wildflowers and how lava flows shape mountains.

There’s also a small theater playing a short film about Mount Rainier’s history and why conservation is essential.
If you want souvenirs, the visitor center has a gift shop, but I found the store inside Paradise Inn offers better quality apparel.
11:20 AM Lunch at Paradise Camp Deli
The Paradise Camp Deli opens at 11 AM. When we visited, a line formed before the doors even opened. You’ll find a mix of grab-and-go snacks, pizza, BBQ, drinks, and other hot meal options—perfect for refueling without leaving the area.
The food is pricey but worth it for the convenience.
We grabbed a spot at a picnic table just outside the visitor center, facing the mountain—one of the best casual lunch views you’ll find anywhere!
11:50 AM Drive to Inspiration Point (10 min)
It’s an easy pull-off stop with plenty of parking. The views make it one of the most underrated spots in Paradise.
Afternoon
12:00 PM Inspiration Point (15 min)
From here, you get a broader view of Mount Rainier than at Paradise. You can see more of the mountain’s base, which drives home just how dramatically Rainier rises from the landscape.
Facing the other direction, the views of the Tatoosh Mountains and the valley below are stunning.

12:15 PM Drive to Reflection Lake (10 min)
Parking here is limited considering its popularity, with maybe 20 parking spots. The good news is that it was a quick stop for most people; there always seemed to be a car or two pulling out.
12:25 PM Reflection Lake (20 – 30 mins)
It’s a short walk down to the water’s edge, but bring trekking poles if you have them; they’re helpful for the uneven rock steps leading down.
There’s only one bench here, but I noticed a smart couple who brought their camping chairs and settled off to the side, quietly soaking up the view.
The light wind during our visit meant we didn’t see Rainier’s reflection, but it didn’t matter. The picturesque scene of Rainier towering above the lake, framed by evergreen trees, made it one of my mom’s favorite stops of the day.

12:55 PM Drive to Narada Falls (10 min)
The lot fits 30 – 40 vehicles and plenty of parking was available.
1:00 PM Narada Falls (25 – 35 min)
This stop is not to be missed when driving on Paradise Valley Road.
You’ll see excellent creek views from the bridge, so non-hikers can still enjoy this stop.
If you’re able, follow the short trail down to the lower viewing platform. It’s a bit steep and rocky in sections, but the payoff is worth it. I loved feeling the spray on my face as I stood before the falls.
The best views are from the lowest viewing platform. Not only will you see the falls drop into a gorge, but my sister and I caught a rainbow at the base, visible only in the afternoon on sunny days.

1:35 PM Drive to Ricksecker Point (10 min)
Ricksecker Point is a one-way scenic loop with plenty of parking and several pullouts.
The Rainier views here are similar to Inspiration Point, but what stood out most to me was the view in the opposite direction—the Nisqually River carving its way through the valley, extending outward from the mountain.

It’s a striking visual of how much Rainier has shaped the surrounding landscape.
1:45 PM Drive to Glacier Bridge (10 min)
There’s parking on either side of the bridge—a small pullout on one side and a large parking lot on the other, making it an easy stop.
1:55 PM Glacier Bridge (10 – 15 min)
It’s easy to skip this stop, but don’t. The views from Glacier Bridge are incredible! The Nisqually River cuts through the rocky valley basin below, its flow strong and audible.
Looking down, I got a little queasy in my stomach, but then my sister pointed out something I almost missed—two unnamed waterfalls flowing down the distant cliffs, feeding the river.

This park’s incredible beauty can’t be denied, even at lower elevations.
2:10 PM Drive to Christine Falls (5 min)
The small parking area fits 10 – 11 cars, but again, we got a spot right away. Maybe it was our lucky day!
2:15 PM Christine Falls (15 – 20 min)
The short trail to Christine Falls is partially paved, making it easy for most visitors to access the viewpoint.
This is another of the park’s most photographed spots—the historic stone bridge perfectly frames the waterfall as it cascades below. It’s a must-stop for photographers.
Besides the falls, I marveled at the delicate purple wildflowers lining the path. It was still early in the wildflower season, so spotting those blooms made this stop even more memorable.

2:35 PM Drive to Longmire (10 min)
At this point, my sister had to head back home, so we all drove toward the park exit.
But if you’re still exploring, Longmire makes a great final stop as you drive out of Paradise.
This historic district is one of the oldest developed areas in Mount Rainier National Park, known for its towering old-growth trees and rustic early-1900s buildings.
While it’s easy to stop in Longmire on your way to Paradise, I recommend skipping it in the morning and heading straight to Paradise to secure parking. Save Longmire and its shaded trails as an afternoon escape from the summer heat.
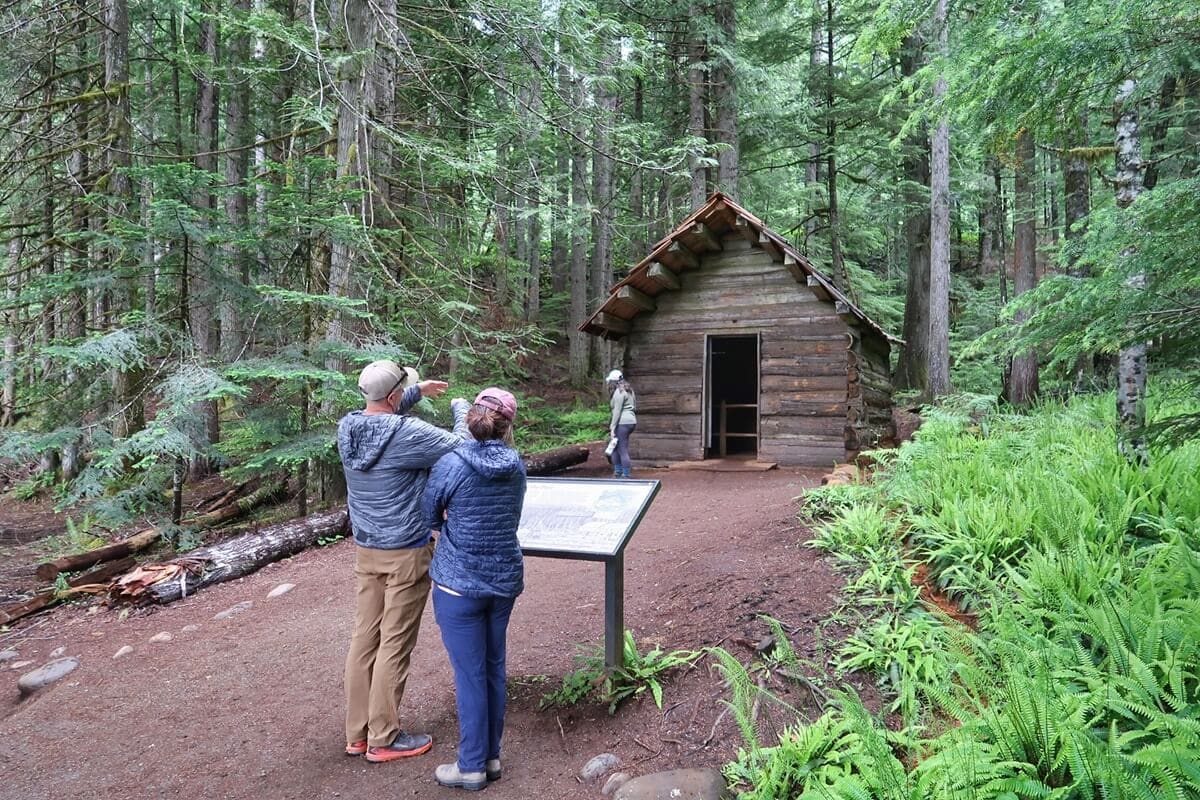
2:45 PM Trail of the Shadows (30 min)
The Trail of the Shadows is a flat, easy loop through the forest and past a historic homestead site—perfect for winding down your visit.
Along the way, you’ll find informative placards sharing the story of James Longmire, the area’s namesake. His wandering horses led him to the mineral hot springs here, sparking the creation of Longmire’s Medical Springs Resort, the remains of which are on this trail.
Reading the delightful book A Year in Paradise, I learned that his sons created many park trails.
3:15 PM Longmire Historic District (optional)
If you’re not quite ready to head out, Longmire is the perfect spot to linger before leaving the park.
Pop into the Longmire Museum for a quick look at exhibits on the park’s history and geology, or stop by the General Store for a snack, drink, or bathroom break before your drive.
The historic National Park Inn and its restaurant are also here, but if you’re hungry, I recommend waiting until Ashford for more dining options.
Sunrise 1-Day Itinerary
My mom and I explored Sunrise on a Sunday and had a fantastic time even with there being only two trails that her knees could handle.
It felt much more relaxed than the day before. Unlike Paradise, where cars lingered in the lots waiting for people to leave, several spots were available in the early afternoon.

Sunrise is best for hiking-focused visits, with fewer amenities and more wide-open alpine terrain.
Instead of exact timing, this itinerary offers flexible options so you can plan your day around the hikes you want to tackle.
Morning
Sunrise Views or Sunrise Point Overlook
If you can handle an “alpine start,” waking up in the middle of the night, start your day watching the sunrise in the Sunrise area. Seeing Rainier’s glaciers glowing in pink hues is why this area is aptly named.
But if you, like most people, arrive later in the day, stop at Sunrise Point Overlook before you even reach the visitor area.
I pointed out Mount Adams in the distance to my mom, who wouldn’t otherwise hike high enough to catch volcano views.
Hikers and non-hikers alike will enjoy the wow factor here—panoramic views provide a sense of Rainier’s place within the Cascade Range.

Driving to the visitor center, if “the Mountain is out,” you might find yourself pulling over on Sunrise Road, like I did, to marvel at Rainier’s rugged east face.
Choose an Easy or Challenging Hike
There are many great options depending on your ability and interest, but here are two in particular that I love.
Easy Option – Sunrise Nature Trail (1.5 miles)
This short, scenic loop starts at the visitor center and immediately offers incredible views. My mom stopped often, amazed by how close Rainier felt and the surrounding mountain vistas.
We hiked the loop heading left at the Y, which meant that Rainier was in front of us as we completed the trail.
This astounding view offers one of the biggest payoffs for the effort.
Hard Option – Burroughs Mountain Trail (7 miles roundtrip)
If you’re up for a challenge, instead of turning right to stay on the Sunrise Nature Trail, head left towards the Burroughs Mountain Trail.
My hiking partner Jenna and I returned two weeks after I visited with my mom to do this hike, one of the most epic in the park for its tundra-like landscape and proximity to Rainier’s summit and eastern glaciers.
We were so lucky that the clouds broke while we ate lunch at Second Burroughs. It’s the best view of Rainier I’ve seen, not just because of how close you are to the Mountain but because of the dramatic valley views beneath it.

Midday Break – Visitor Center & Lunch with a View
After the Sunrise Nature Trail, my mom and I headed to the visitor center to explore the exhibits without crowds.
I appreciated the panel on specific notable rock formations. What’s cool is that you get the exact view looking out the window, only now you know the names of the features you’re looking at.

There’s a small cafe in the Sunrise Day Lodge, but options are limited and there’s no indoor seating. Pack a picnic lunch and eat outside while enjoying the views.
Afternoon
Choose an Easy or Moderate Hike
Both hikes offer a chance to see incredible White River Valley views.
Easy Option – Silver Forest Trail (2 miles roundtrip)
After lunch, my mom and I hiked the easy Silver Forest Trail, a delightful way to immerse in an alpine forest setting while still getting high mountain views.
Stop at both Emmons Vista Overlooks along the way.
The first overlook was bigger and more spacious, while the second overlook revealed a glacier-fed, seafoam green lake and valley river below.
Moderate Option – Sunrise Rim Loop to Glacier Overlook (3 miles roundtrip)
The underrated Sunrise Rim Loop starts or ends the same as the Burroughs Loop, depending on which way you hike it.
But it’s a much shorter hike with the option to branch off to the Emmons Glacier Overlook, one of the most breathtaking vantage points in the park.
You’ll see sweeping valley views below Rainier—similar to Emmons Vista but even more dramatic.

Optional Add-Ons: Tipsoo Lake & Waterfalls
If you want to explore a lake or waterfalls beyond the Sunrise Visitor Center area, here are two great attractions to swap in or add if time allows.
Tipsoo Lake
Tipsoo Lake is a scenic, easy stop off Chinook Pass Scenic Byway, one of the prettiest drives near the park.
This alpine lake sits right off the road with parking, vault toilets, and picnic tables. It’s an easy walk on a dirt path suitable for all ages.
On one of my stops at Tipsoo Lake, tadpoles lined the lake’s shoreline, and scarlet paintbrush filled the fields surrounding it.

Hidden Gem Waterfall Option – Eastside Trail to Stafford Falls (3 miles roundtrip)
Jenna and I hiked part of the Eastside Trail down to Stafford Falls. We passed only one couple as we started, making it an excellent hike for solitude and shade.
The trail features three waterfalls, but my favorite was Chinook Cascades, where crystal-clear water spills into turquoise pools framed by moss-covered boulders.
Pull-out parking fits 5 – 7 cars near the Owyhigh Lakes Trailhead off Highway 123.
5 Tips to Help You Plan Your Mount Rainier Day Trip
Here are seven tips to plan your late spring, summer, or early fall day trip like a local.
1. Know whether Timed Entry is in effect.
A timed entry reservation may not be required in 2026. In recent summers when the park used Timed Entry during peak season, I booked my reservations as soon as they were released.
2. Check Mountain Forecast.
Clear skies make all the difference, so check Mountain Forecast. If clouds are forecasted, prioritize waterfalls, lakes, and low-elevation forest hikes where mountain views aren’t the focus.
3. Download offline maps.
Cell service is unreliable in the park. I always download my AllTrails maps before I go and grab a paper map at the visitor center as a backup.
4. Know which park entrance to use.
Most visitors use the Nisqually Entrance for Paradise, although the Stevens Canyon Road Entrance less busy. Use the White River Entrance if you’re heading to Sunrise.
5. Pack your own food and snacks.
Bring a packed lunch, plenty of sweet and salty snacks, and a hydration bladder to stay fueled on the trail.

What to Pack for Mount Rainier
Mountain weather changes fast, so pack layers you can add or shed easily.
I wear a moisture-wicking long-sleeve top to avoid having to reapply sunscreen on my arms and chest.
Other essentials include a sunhat, sunglasses, and my favorite face stick sunscreen.
Since trails are uneven, wear sturdy footwear and bring trekking poles. They help with footing, especially on gravel or dusty sections.
Ashford or Packwood: Where to Stay for an Early Start
While there are a few small towns near Mount Rainier, Ashford and Packwood are your best bets for quick access to park entrances.
- Book a stay in Ashford if you’re visiting Paradise. It sits right outside the Nisqually Entrance, making it the most convenient base.
- Book a stay in Packwood if you’re visiting Sunrise. It’s the closest town to the White River Entrance.
Bonus if you stay in Packwood: It’s also the closest town to the Stevens Canyon Entrance, which also leads to Paradise.
This entrance sees far less traffic than the busy Nisqually Entrance, especially midday—perfect if you’re getting a later start.
Wrap-Up: Can Mount Rainier Be Done in One Day?
Yes, you can experience the best of Mount Rainier in just one day! Choose Paradise if it’s your first visit, and start early. Expect unforgettable mountain views, wildflower meadows, waterfalls, and scenic hikes—all easily doable on a day trip from Seattle.
RELATED TRIP PLANNING POSTS:
➥ How to Visit Mount Rainier & Plan the Perfect Trip Length
➥ Best Time to Visit Mount Rainier: Will the Mountain Be Out?
➥ 17 BEST Things to Do at Mount Rainier (Non-Hikers Too!)
➥ 7 BEST Towns Near Mount Rainier for First-Time Visitors
➥ 15 BEST Places to Stay Near Mount Rainier (& Places to Skip!)
➥ National Park Inn Review: Pros, Cons & Why I’d Return
➥ A First-Timer’s Guide to Paradise at Mt Rainier (Hikes & Attractions)
➥ Longmire Mount Rainier: What to Do, When to Visit & Why It’s Worth It
➥ Mount Rainier 1-Day Itinerary (Best Hikes & Stops)
➥ Skyline Loop Trail Guide: 10 Reasons It’s WA’s Best Day Hike
➥ 10 Tips to Avoid Crowds at Mount Rainier in Peak Season

Skip the guesswork, stress, and hours of research—let me help you plan your itinerary!