Hike to Camp Muir: Ultimate Guide to Help You Prepare

Are you planning to hike to Camp Muir but wondering if you have what it takes to get there?
I’ve attempted this day hike four times and completed it three times. I can tell you from experience that it’s tough.
The first time I hiked on the Muir snowfield, there were moments when I felt like quitting!
But with the help of short breaks, plenty of water, and sugary snacks to keep me going, I finally reached this bucket list destination.
In this guide, I’ll share all the information you need to prepare your mind, body, and gear to reach Camp Muir on Mount Rainier.
Let’s jump in!
How Hard is the Hike to Camp Muir?
This strenuous day hike is not for first-time hikers. Climbing nearly 4,800 feet in 4.4 miles takes physical strength, endurance, and mental toughness.
In addition to the elevation gain, other factors that make this hike difficult include the terrain, potential weather conditions that can become fatal, and altitude.
Camp Muir stands at 10,188 feet above sea level.
Beginner hikers can do this hike if the conditions and weather are favorable, the boot path is well established, and the crevasse danger is minimal.
If you’re a beginner hiker, you must be in good physical condition and come prepared with the right gear and navigation tools. Be ready to turn around if circumstances dictate that that’s the safest choice.

I had completed only six hikes in the month-and-a-half before my first hike to Muir.
But I was in good shape and aware of the challenges I might face.
I chose a Saturday in July when the route was established, and many other hikers would be on the trail. The forecast looked excellent.
I also hiked with a friend who was experienced with the route, having completed the hike once before.
The second and fourth times I completed this hike were the first leg of a guided summit climb of Mount Rainier in July and August. I was much more physically fit for those attempts.
My third attempt was in May when snow covered the entire trail.
Elevation and Altitude
This hike is known for its considerable elevation gain.
You’ll start at 5,420 feet at Paradise, the park’s most popular visitor area, located on the south side of Mount Rainier, and ascend to 10,188 feet.
This gain of nearly 4,800 feet occurs over 4.4 miles, making the hike steep.

Additionally, if you’re someone easily affected by higher altitudes, you may feel symptoms of altitude sickness.
I felt the change in altitude at about 8,000 feet.
I took deep breaths and slowed my pace a bit. I drank a lot of water and ultimately was fine.
Terrain
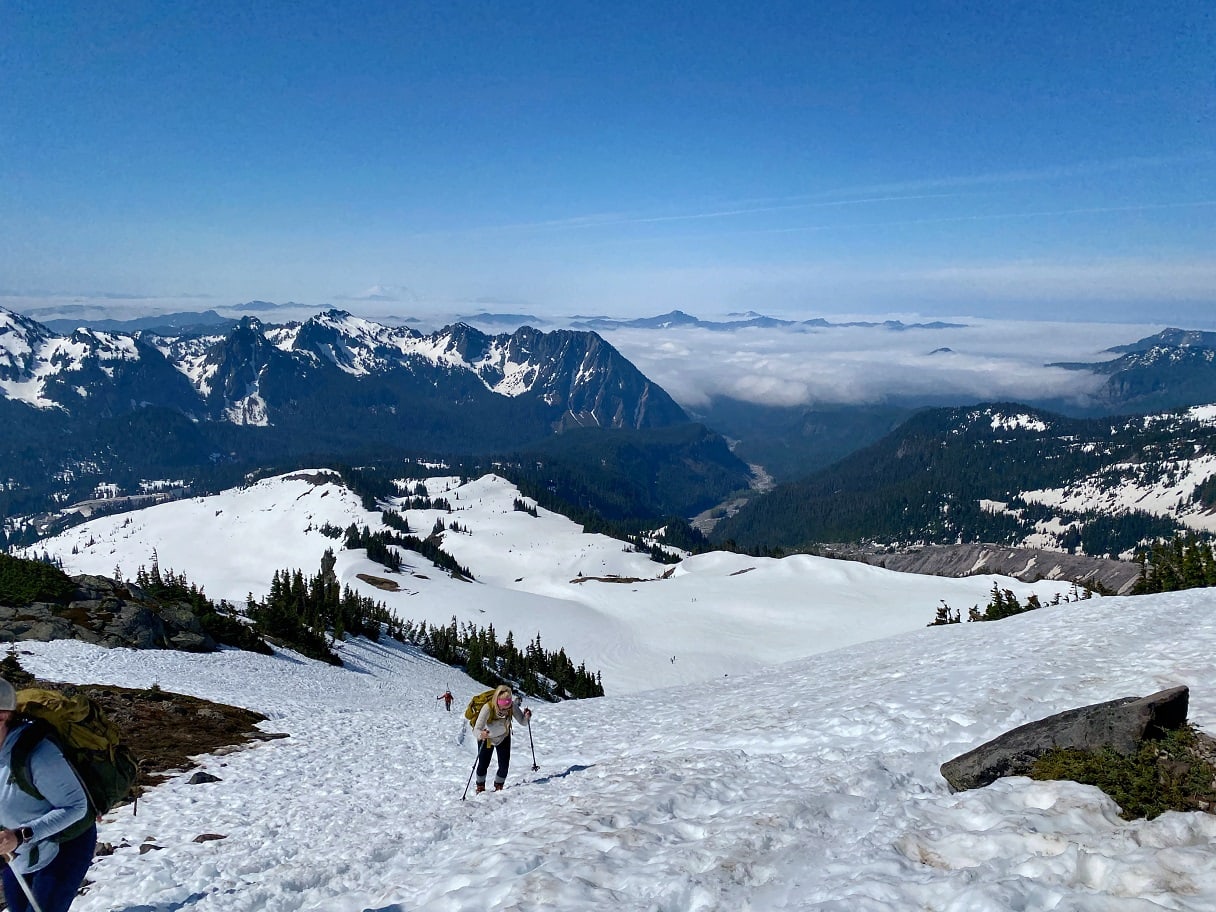
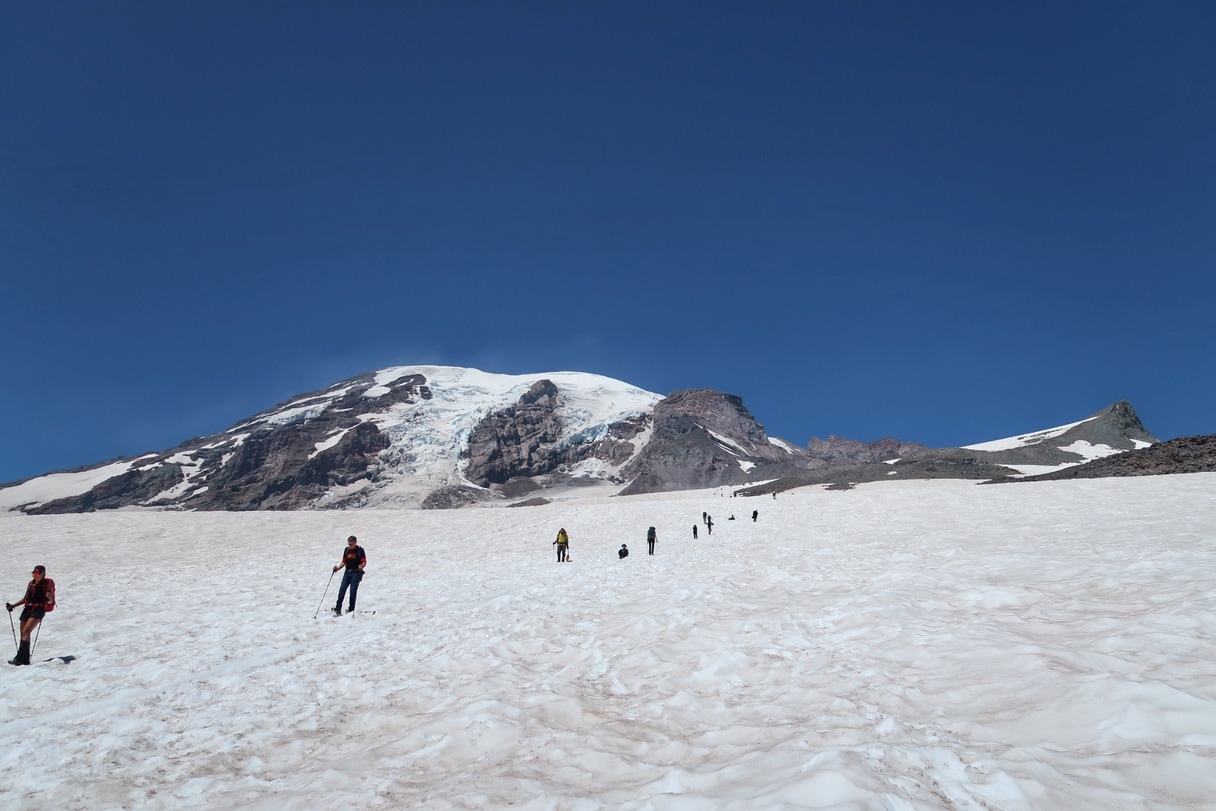
The terrain varies depending on the time of year. Generally, in July and August, it includes rocky sections and the large, continuous Muir snowfield.

The final roughly two miles of the trail before you reach Camp Muir are consistently snow-covered. Snow travel can be physically demanding and requires careful navigation.
Weather Conditions
Mount Rainier is known for its rapidly changing weather, which can go from clear to foggy or stormy within a short time frame. This is more likely during shoulder seasons but can happen anytime.
Poor weather makes the route more difficult and dangerous, especially if visibility is reduced.
My hiking partner, Jenna, once had to turn around on this trail due to white-out conditions.
Turn around if the weather becomes unsafe. It’s always the smart thing to do!
Distance and Duration
The round-trip distance from the parking lot at Paradise to Camp Muir and back is about 8.8 miles.
This might not sound very long if you hike or run regularly. But the combination of steep inclines, snow, and altitude can make it an exerting full-day adventure.
How Long Does it Take to Hike to Camp Muir?
Certain variables will affect how long you will take to complete this hike. These include weather, how far the snowline extends towards Paradise, and your fitness level and pace.
The average time to complete this adventure is eight hours.
Of course, the length of your adventure also depends on how many breaks you take and how often you stop to take photos.

I strongly advise that you know what time is sunset. This will help you determine if you need to turn around if you’re moving slower than expected.
I recommend padding your schedule for more breaks and stops than you think you will take.
The first time I did this hike with Jenna, we stopped to listen to the call of marmots and take photos of them.

We took many breaks to fuel and hydrate on the neverending snowfield.
We spent about an hour at Camp Muir to enjoy the incredible views.
On the way back to the parking lot, we stopped to take photos of the gorgeous wildflowers in bloom during our late-July trip.
Our moving time was 7 hours and 20 minutes.
But the total time of our day’s adventure was an epic 10 hours and 30 minutes!

If you’re hiking to Muir on a summit climb with a guided group, guides generally try to get you there in under five hours.
This might seem like a lot of time, but you’re carrying nearly 50 pounds in your backpack!
Is the Camp Muir Hike Dangerous?
This hike has been called one of America’s ten most dangerous hikes.
Many day hikers set out unprepared for quickly changing weather. Whiteout conditions increase the risk of getting lost.
A navigation error can lead to encounters with steep cliffs or crevasses, real and fatal dangers.
Sadly, people have died between Paradise and Camp Muir.
Take this hike seriously!
get LOCAL INSIGHT
Want quick clarity?
Get clarity on one key decision and walk away knowing your plan actually makes sense. Sessions start at $40.
Paradise to Camp Muir Hike: Things to Know
You reach Paradise via the Nisqually Entrance of Mount Rainier National Park. Follow the signs to the Henry M. Jackson Visitor Center.

The first time I hiked to Muir was a Saturday in late July. The first parking lot at Paradise was already full when we arrived at 8:20am. The second lot filled up quickly.
Amenities available at Paradise include toilets, a water fountain, and even a cafe inside Paradise Inn. I was grateful for the double shot of espresso to help me charge up the trail!
NOTE: Download the route onto your phone before arriving at Mount Rainier National Park. I use AllTrails Pro.
Do You Need a Permit to Hike to Camp Muir?
You do not need a permit for day hiking to Camp Muir.
A wilderness permit is required if you plan to camp overnight at Muir.
You also need a climbing permit if you plan to climb above 10,000 feet or onto glaciers.

Trail Information
- Route: Camp Muir via Skyline Trail
- Hike length: 8.1 – 8.8 miles roundtrip
- Elevation gain: 4,665 – 4,768 feet
- Difficulty: Hard
The amount of snow on the Skyline Trail depends on when you do this hike.
In May of 2023, we traveled on snow as soon as we left the parking lot.
In July and August, the times I have been there, snow travel did not begin until after Pebble Creek, almost two miles from Paradise.
What You’ll See
This alpine landscape is stunning year-round.
The scene was still wintery in May, with snow covering the landscape.

Below, I describe what you can expect when conditions are generally optimal in July and August.
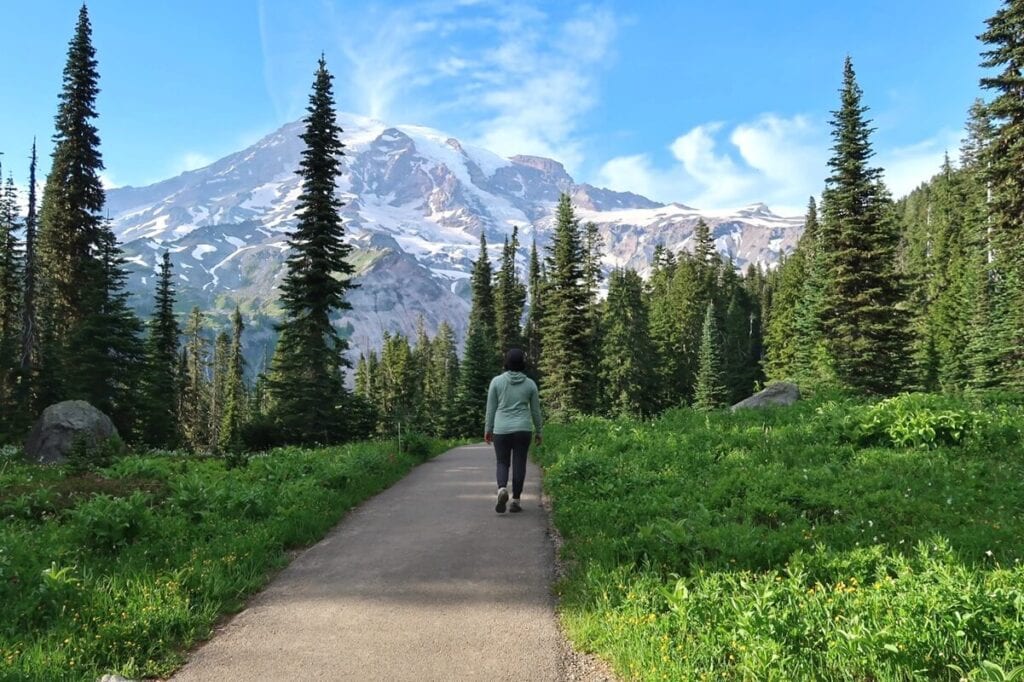
Paradise gets packed with tourists.
Crowds flock here to see wildflowers on display and Mount Rainier standing proudly in the backdrop.

Please stay on the designated pathways. There are signs stating this, but you’ll see many tourists who are oblivious to the fragility of this ecosystem.
As you climb up the trail’s steps, you might see marmots. You’ll most likely hear them before you see them.
Once you cross Pebble Creek, it’s time for snow travel.

The boot path is obvious this time of year.
On the weekend, so many people are on the trail that if the weather is clear and you check in often with your navigation device, the chances of getting lost are unlikely.
NOTE: Follow the path of the people ahead of you with caution. Always check in with your navigation device to ensure you’re on the right track.
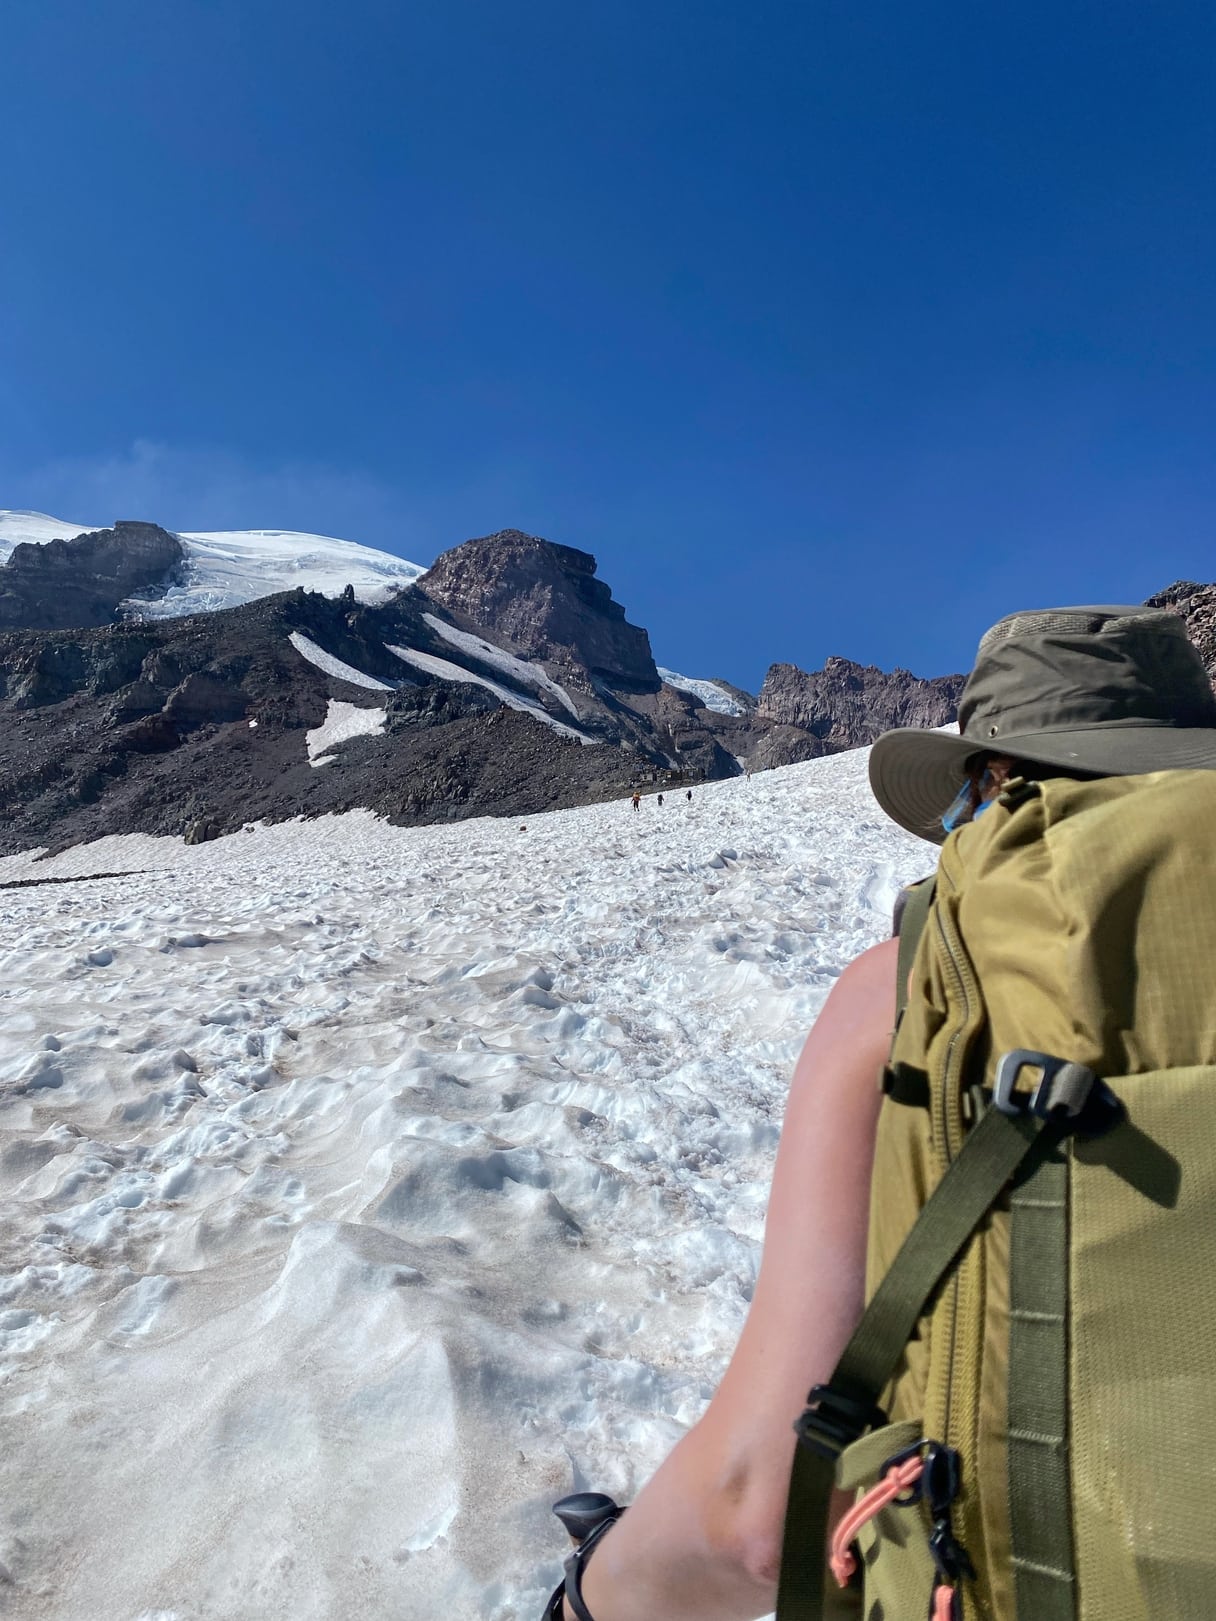
Once you’re on the snowfield, it’s game on.
When you reach the point you could not see beyond ten minutes ago, you’ll see there’s much more snowfield to hike.

Carry on.
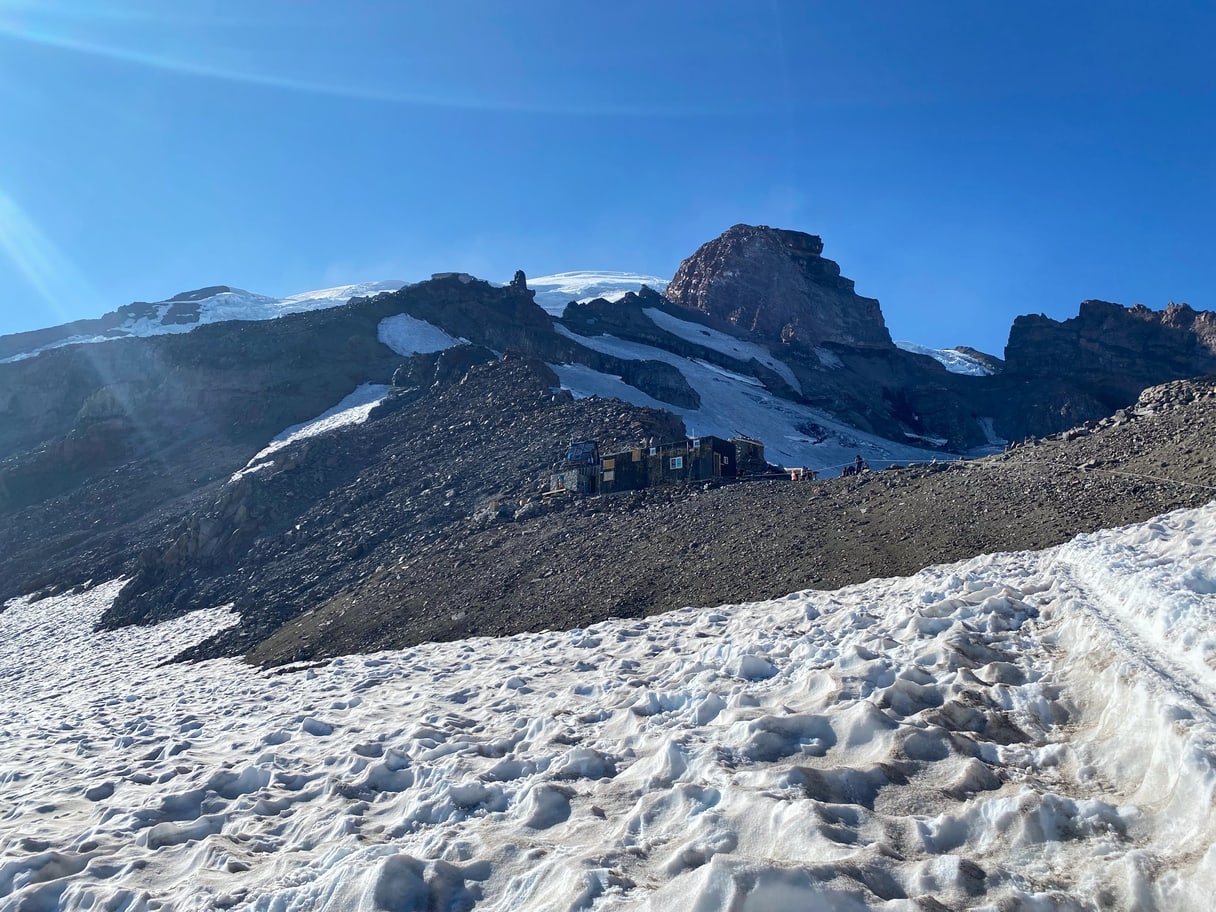
Camp Muir will eventually come into view, but it will be a while before you arrive.
If you begin to feel deflated, turn around. Take in the sweeping views of the Tatoosh Range and three volcanoes. On a clear day, you’ll see four volcanoes.

I still remember how elated I was to arrive at Muir for the first time.
Unfortunately, there was a smoke haze.
But looking out and seeing Mount Adams, Mount Hood, and Mount St Helens in the distance was incredible.

Glissading
I had never glissaded before my first trip to Camp Muir.
On my way up, I saw people sliding on their bottoms on what looked like built-in slides in the snow. These are known as chutes.
Glissading is a quicker way to get down the mountain, but know the risks involved before you do it.
It’s easy to go too fast, lose control, and tumble down the mountain.
Here are a few safety tips for glissaders:
- The snow should be soft. Hard, icy conditions can be dangerous.
- Remove your crampons or microspikes before you begin. These can catch on your pants and trigger an accident.
- Use your hiking poles as a rudder or brake to help you control speed and stop. You can also dig your feet into the snow to slow down. I’ve caught my feet on rocks doing this, so always be alert.
- If you’re a beginner, start on smaller, less steep slopes.
Always prioritize safety over speed and fun. If you feel hesitant, choose the safer option of walking down.

How to Prepare for the Camp Muir Hike
Feeling ready for this strenuous activity requires physical conditioning, mental fortitude, good nutrition, proper hydration, and the right gear.
NOTE: Consult your doctor or a certified training professional before beginning any new training plan.
Conditioning
If you’re in good physical shape and work out 2-3 times a week, you can be ready for this hike in 6-8 weeks.
That’s where I was. I hiked regularly for only six weeks before my first attempt, which was successful.
Only some of those hikes were challenging, and hiking on the weekends was the bulk of my preparation. I also took one yoga or HIIT class during the week.
That said, getting to Muir was very hard for me the first time.
There were moments when I wanted to give up.
The truth is that I had not adequately trained for it.
If you give yourself more time to train intentionally with cardio sessions, strength training, and longer hikes, the experience will be much more enjoyable.
3-8 Weeks Before Your Hike
Cardio – 3X per week
- Aerobic Activities: Cardio builds endurance, which is crucial for long hikes.
- Hiking: Gradually increase distance and elevation to build stamina. Hiking one time per week is sufficient.
Strength Training – 2X per week
- Leg Strength: Strengthen your legs with squats, lunges, and step-ups.
- Core Strength: Improve your balance and stability by incorporating planks, Russian twists, and bicycle crunches.
- Back and Shoulders: Exercises like rows, pull-ups, and shoulder presses strengthen muscles needed to carry a heavy backpack.
Flexibility and Balance – Minimum 1X per week
- Stretching: Flexibility can help to prevent injuries. Include pigeon pose to open up your hips and stretch muscles connected to your knees.
- Balance Exercises: Balance is important for navigating uneven terrain. Practice exercises like single-leg stands and yoga poses like tree pose.
If you’re interested in a training plan geared toward beginners, check out this plan from fitness coach Sarah Maurer.
I’ve used her training plans to prepare for the Enchantments and climbing volcanoes, and I highly recommend them!

2 Weeks Before Your Hike
10-14 days before your hike is a strategic window for your “peak” physical preparation.
Ideally, this is when you will do your hardest hike, such as a 4-6 hour hike with 2,500 – 3,000 ft of elevation carrying the weight you plan to bring to Muir.
One week before your hike, do at least three hours of cardio, and maybe not too much more than that. You could choose a short hike or head to the gym to hop on a treadmill or bike.
I recommend tapering from your usual workout volume for the 4-5 days prior.
You want to show up at Paradise feeling strong yet rested and ready for a challenge!
Mental Toughness
Prepare your mindset by reading trip reports in the weeks leading up to your hike. Know the challenges others have faced.
Hiking when the weather’s bad or working out when you don’t feel like it are great ways to build mental toughness.

Nutrition
I love eating all the gluten-free pasta I want the night before a big hike.
This coach advises against carb loading, but do what you know works for you.
Remember, you can never go wrong with eating well-balanced meals consisting mainly of whole foods.
Hydration
Proper hydration begins during the days preceding your hike.
The day before, I try to drink half of my body weight in liters of water before noon. And then, I continue to drink water throughout the rest of the day.
The morning of, I drink 24-32 ounces of water before I reach the trailhead.
I also fill one of my two 32 ounce Nalgene bottles with water and electrolytes to drink while hiking.
Gear
Trip reports will inform you of the gear you need for a successful trip.
If five hikers say they’re glad they wore hiking boots and microspikes, and one hiker says he did it in sneakers, I will show up with hiking boots and microspikes.
The right gear is so critical for this adventure that I’ve included a section below.
What to Bring When Hiking to Camp Muir

Below is a list of my top ten recommended things to wear and bring on your Camp Muir hike in July or August. Also, check out my complete Camp Muir hike gear list.
- Waterproof hiking boots – I’ve never gotten a blister in my Oboz boots.
- Microspikes – These are durable and easy to put on.
- Gaiters – Bring gaiters to avoid wet socks and cold feet!
- Sun hoody – Avoid the need for messy reapplications of sunscreen on your arms and neck.
- Rain pants – Bring a pair in case the weather turns. They’re also great for glissading.
- Sunhat – Sun protection is essential.
- Sunglasses – Protect your eyes from harmful snow glare.
- Trekking poles – These are helpful on the snowfield and the descent. For me, they’re mandatory.
- Sunscreen – Sunscreen is critical, especially for parts of the face vulnerable to snow glare, like the inside of your nose.
- Satellite communication device – My Garmin InReach Mini accompanies me on every hiking trip.

WANT PEACE OF MIND WHILE HIKING? I feel safe knowing that I can call for emergency help should I ever need it. This lightweight device fits in my hip belt pocket. BUY A GARMIN INREACH MINI HERE.
I’m adding a bonus item to this list: toilet paper for the pit toilets at Muir.
Be prepared for the stench!
Food and Water
Bring enough food to eat a snack (150-250 calories) every hour-ish while you hike.
Plan for a 10-hour adventure, but bring extra food.
A variety of sweet and salty foods is best.
My go-to snacks on the trail are GoMacro bars, Clif Bloks, and Haribo sour gummy bears.
Bring at least three liters of water and a filter to fill up, if needed.

Best Time to Hike the Camp Muir Trail
July and August offer the most favorable conditions.
Remember, snowfall and freezing temperatures have occurred during these months, catching day hikers off guard and ill-prepared.
Always check conditions and weather forecasts and be prepared for the unexpected.
Wrap-Up: Ultimate Guide to Hiking to Camp Muir
The hike to Camp Muir is extraordinary, offering spectacular views of Pacific Northwest volcanoes and a sense of accomplishment.
It’s a rewarding but serious undertaking requiring physical fitness, preparation, and caution.
Start preparing 6-8 weeks in advance to ensure you’re in the best shape possible for this demanding adventure.
RELATED TRIP PLANNING POSTS:
➥ How to Visit Mount Rainier & Plan the Perfect Trip Length
➥ Best Time to Visit Mount Rainier: Will the Mountain Be Out?
➥ 17 BEST Things to Do at Mount Rainier (Non-Hikers Too!)
➥ 7 BEST Towns Near Mount Rainier for First-Time Visitors
➥ 15 BEST Places to Stay Near Mount Rainier (& Places to Skip!)
➥ National Park Inn Review: Pros, Cons & Why I’d Return
➥ A First-Timer’s Guide to Paradise at Mt Rainier (Hikes & Attractions)
➥ Longmire Mount Rainier: What to Do, When to Visit & Why It’s Worth It
➥ Mount Rainier 1-Day Itinerary (Best Hikes & Stops)
➥ Skyline Loop Trail Guide: 10 Reasons It’s WA’s Best Day Hike
➥ 10 Tips to Avoid Crowds at Mount Rainier in Peak Season

Skip the guesswork, stress, and hours of research—let me help you plan your itinerary!