Mt Rainier Guided Climb: What to Know Before Booking

Wondering if climbing Mount Rainier with a guide is really worth the cost?
I’ve done it twice with Rainier Mountaineering, Inc. (RMI), once in 2022 and again in 2023, so I’ve experienced what it’s like to wake up in the middle of the night, get ready with seventeen other people in a small bunkhouse, and rope up in the dark.
I stay connected with climbers and guides each season, so everything here reflects what you can expect today.
This guide breaks down the day-to-day itinerary of a 4-day climb with RMI, what it’s really like to summit with a guide, and whether the cost of a Mt. Rainier guided climb is worth it for first-time climbers.

Do you need a guide to climb Mt Rainier?
Safely climbing Mount Rainier requires navigation, hazard recognition, glacier travel with a rope team, self-arrest techniques, belaying and crevasse rescue skills. If you’re not skilled in doing these specific things as if your life depended on it, climbing with a guide is necessary.
I’ve summited Mount St Helens and Mount Adams. I’ve climbed Mount Baker and reached Sherman Crater. I’ve completed one-day mountaineering courses three times with RMI and Northwest Alpine Guides.
And I can say with certainty that I do not have the knowledge and skills to climb Mount Rainier without a guide.
Can a beginner climb Mt Rainier?
If you’re a beginner mountaineer, you can climb Mount Rainier. But to reach the summit, you’ll need to be in the best shape of your life. This means 6 – 9 months of endurance training, minimally.
Most guide services ascend about 1,000 feet of elevation per hour. The pace may feel steady at first, but it can feel intense after a few hours. On my first attempt, two people on my team turned around on the snowfield before Camp Muir, where teams rest before the summit push.
Not only is there elevation gain and a set pace to keep up with, but you have the added challenge of weight on your back. My backpack, loaded with my sleeping bag, clothing layers, and mountaineering gear, weighed 42 pounds for the hike from Paradise to Camp Muir.
Being fit enough to sustain climbing up and down the mountain is something you can control, but many variables out of your control add to the difficulty.

On summit day, route and weather conditions can change as you travel to the upper mountain. My guide shared that she once ascended in 70 mph winds, and in that weather, wind can easily knock you down if you’re not feeling strong.
And then there are the characteristics of a big mountain to contend with: crevasses, seracs, rock fall, and exposure.
All of these factors can make the climb dangerous or even fatal if you’re not with a guide.
TIP: The National Park Service (NPS) recommends climbing one of the volcanoes below on the listed route before attempting the Disappointment Cleaver on Mount Rainier.
✔ Mount St Helens, Monitor Ridge or Worm Flows
✔ Mount Hood, Hogback Glacier
✔ Mount Adams, South Side Climb
✔ Mount Shasta, Avalanche Gulch
✔ Mount Baker, Easton Glacier
My Day-to-Day Experience on RMI’s 4-Day Climb
As I mentioned, I’ve only climbed Mt Rainier with RMI. Here’s the itinerary from their Four Day Climb.

Day 1 • Pre-Trip Orientation
This first day is relaxed and begins at 3pm, allowing enough time for this day to be a travel day.
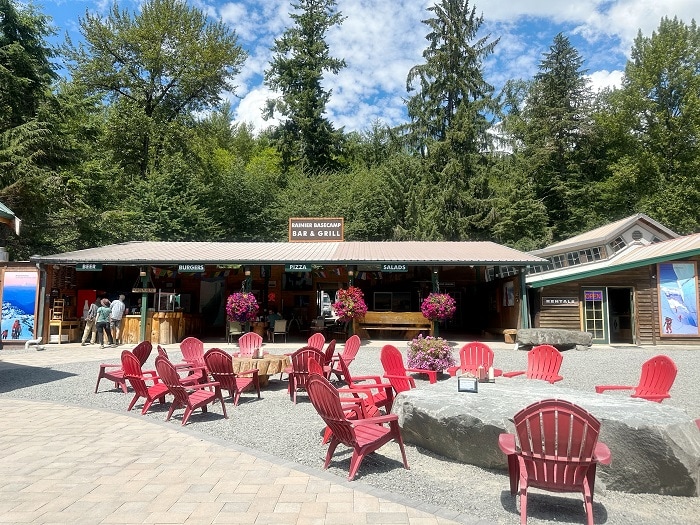
Orientation takes place at RMI’s Rainier BaseCamp in Ashford.
It includes meeting the lead guide and everyone on your team, a thorough gear check, and an informational slideshow about RMI’s history, environmental considerations, what to expect over the next three days, the climbing route, and fitness expectations.
I’m a gear junkie and made sure my gear matched the specs on their required gear list. All of my personal equipment was good to go.
Some of my teammates were instructed to rent gear from the on-site rental hut or Whittaker Mountaineering retail store.
Day 2 • Mountaineering Day School
- Total time: 2 – 2 1/2 hours roundtrip
- Elevation: 1,000 ft
- Total distance: 4 miles roundtrip
- Pack weight: 20-25 lbs
Day 2 is when you meet the second of three guides for your team, and team dynamics begin to establish.
Everyone meets at 8am at Rainier BaseCamp, ready to hike. RMI’s shuttle takes climbers from Ashford to Paradise.
After climbing roughly 1,000 ft of elevation, during which our lead guide set the pace to be expected for the next three days, we arrived at the site of Mountaineering Day School.
Knowing how to put on your harness, mountaineering boots, gaiters, and crampons is a major confidence booster. I could immediately tell who had tried on their gear beforehand and who hadn’t.

Below is a list of skills I learned at RMI’s mountaineering school.
To safely ascend in snow:
- Step-kicking (a really useful skill I still use today when I hike in snow)
- Duck walk step
- Crossover step
- Rest step
To safely descend in snow:
- Plunge stepping
- Boot skiing (honestly, I never got comfortable with this!)
- Glissading

- How to use crampons
- How to hold and use an ice axe
- How to self-arrest if you fall
- How to self-arrest if a rope team member falls
- Rope team travel
- Pressure breathing
Crevasse rescue training is not included in this entry-level-friendly day school.
That day moved quickly.
I didn’t hydrate sufficiently during mountaineering school, so I was dehydrated during our hike to Camp Muir. Be sure to drink as much water with electrolytes as possible during this day.
Day 3 • Hike to Camp Muir
- Total time: 4 – 6 hours*
- Elevation: 4,600 ft
- Total distance: 4.5 miles
- Pack weight: 40 – 45 lbs
NOTE: *RMI’s website states 4 – 6 hours, but the pace of my guides in 2023 had us up to Muir in under 5 hours, including breaks. It’s intense if you haven’t properly trained. Really consider if this pace suits you before booking.
Day 3 is when you ascend to Camp Muir with a heavy pack.
The team assembles at 8am and everyone meets the third and final guide of the group.
I highly recommend drinking 1 liter of water that morning, adding electrolytes to your water. There’s time to eat and drink on the shuttle from Rainier BaseCamp to Paradise.
The steep elevation is felt immediately after leaving the Paradise parking lot.
After an hour or so of hiking, 10 – 15 minute breaks are taken as a team. Guides want you to drink a ½ liter of water and eat roughly 200 calories each break to remain sufficiently hydrated and nourished.
Hopefully, your mountaineering training prepared you for all the steps you’ll take on the trail before arriving at the Muir snowfield.
Once you’ve made it to the snowfield, the biggest challenge is to keep pace with the guides and the team.

In 2023, I found the pace of our lead guide to be perfect. Our two other guides were newer to guiding and taller. Their pace was roughly half a step faster than our lead guide.
This may not seem like much, but once you’re on the snowfield, you feel it like you feel the weight of your 40 – 45 lb pack.
Once you hit 8,000 ft in elevation, being at high altitude also makes the hike more challenging.
The thing I often forget to do while climbing is remember to enjoy the views.
And the views here are extraordinary.

Once the team arrives at Camp Muir, everyone takes a break, hydrates, and chooses a spot in the bunkhouse. Later, the group meets in the bunkhouse for the lead guides to do their “Guide Talk.”
This is when the logistics of summit day are discussed. Guides review the route and weather conditions, how much food to bring, clothing recommendations, and what time they want us to be quiet and “lie horizontally” in our sleeping bags.
Summit day generally starts between 11pm – 2am in summer, depending on conditions. Your guide likely won’t tell you when they’ll wake you (mine didn’t), so you get as much rest as you can instead of obsessively checking your phone.
Day 4 • Mount Rainier Summit Climb: DC Route to Columbia Crest
- Total time: 10 – 12 hours (summit attempt)
- Elevation: 4,400 ft
- Total distance: 12.5 miles roundtrip
- Pack weight: 20 – 25 lbs
After a few hours of rest – or sleep, if you’re lucky – the lights come on, hot water is brought in, and everyone begins to gear up.
In one hour, harnesses, gaiters, boots, and crampons are on, and rope teams of three climbers and one guide assemble to leave Muir.
The first section crosses over the Cowlitz Glacier and is relatively easy, allowing time for your body to get used to the pacing of your climbing team and the fact that it’s the middle of the night.
Elevation gain begins once the team reaches Cathedral Gap, where guides shorten the rope between team members to better navigate over switchbacks on loose rock and gravel (conditions will be different depending on the time of year). This section – albeit easier – foreshadows what’s to come on the Disappointment Cleaver section.
After ascending roughly 1,170 ft, all teams take the first break at 11,200 ft. Everyone quickly puts on their parkas, eats a snack, and drinks water, in preparation for the crux of the route: the Disappointment Cleaver (DC).

NOTE: The pace of everything on this day may feel rushed from the moment you get up. It may seem like there isn’t enough time to do everything during each break, but there is. When the guides put on their packs, you should do the same without much delay. When traveling higher up the mountain, efficiency is critical in getting safely up and down.
Climbing the DC is the hardest physical activity I’ve ever endured.
Be mentally prepared for the difficulty of this section. There’s a lot of step-ups. You’re traveling over loose rock, gravel, and, hopefully, some snow. In July of 2023, it was all rock and gravel.
Cramponing in rock and gravel requires attention and focus, much more so on the descent.
After reaching the top of the DC at 12,300 ft, it’s time for another break. This is when climbers must decide whether or not they have enough stamina to continue.
The top of the DC is the highest point I’ve ever climbed on Mount Rainier.
It’s not uncommon to turn around here; I returned with two other teammates in 2022. That year, out of our team of nine, four made it to the summit.
From the top of the DC, the team continues onto the Emmons Glacier for the last steep section traveling to the crater rim. Rest-stepping and pressure breathing are the tools that help you to keep climbing the next roughly 2,000 ft of elevation.
The motivation from seeing the first hues of morning light also helps.

Depending on the time of year, you may cross a ladder over a crevasse. One of my teammates who made it to the summit took amazing footage on his Go-Pro.
Teams take another break at 13,500 ft. Here, climbers know the summit is within reach.
RMI does a fantastic job of establishing the route, not just for clients. All climbers benefit from RMI’s boot path and wand placing.
On the upper glacier, once you see the rocks that rim the crater, you’ve just about made it. If conditions are stable, the team will drop their packs and travel the extra distance to Columbia Crest, the true summit.

Who are the best Mt Rainier climbing guides?
Three guide services are authorized to offer multi-day summit climbs, seminars, and private climbs throughout the season on Mount Rainier.
- Alpine Ascents International
- International Mountain Guides (IMG)
- Rainier Mountaineering, Inc (RMI)
In addition to these three companies, a limited number of guide services are authorized to offer just one multi-day summit climb per year.
Guide services will do things similarly. For example, all three guide services mentioned will teach mountaineering skills as part of their itinerary.
But how they differ can significantly affect your experience.

Climbers on RMI’s Four Day Climb, for example, do mountaineering school on Day 2 and hike to Camp Muir on Day 3. My team arrived at camp at approximately 3 pm. All teams on both of my trips left for the summit in the middle of the night for Day 4’s summit attempt.
But climbers on IMG’s 3 ½ Day Climb hike to Camp Muir on Day 2 and do mountaineering school on Day 3. After school, they ascend 1,000 ft to high camp on Day 3, also leaving for the summit in the middle of the night for Day 4’s summit climb.
IMG’s schedule provides an easier day between the two most strenuous sections of the climb and more time to acclimatize. Leaving from high camp instead of Muir means less elevation on summit day.
Unlike RMI, IMG does not count Day 1 (gear check and orientation) as a full day.
TIP: Many companies offer women-only climbs. If those dates don’t work for you, you can request a female lead guide with RMI. I did, and got one both times.
How much does it cost to climb Rainier with a guide?
The costs listed below are for a 3 – 4 day Rainier climb in 2026. Not every guide company is listed here. Contact each directly to verify the current cost and to learn which climbing routes are offered.
- Alpine Ascents International | $3,550
- International Mountain Guides (IMG) | $2,595 – $2,995
- North Cascades Mountain Guides | $2,750
- Northwest Alpine Guides | $3,500
- Rainier Mountaineering, Inc (RMI) | $2,595
NOTE: The Disappointment Cleaver – Ingraham Glacier route is considered the easiest. Other available routes that increase in difficulty are the Emmons-Winthrop Glacier and Kautz Glacier routes. The Liberty Ridge route is the hardest and most dangerous.

Interested in a fundraising climb?
- Climb for Clean Air’s fundraising climb raises money for the American Lung Association.
- Kaf Adventures raises money for the Washington Trails Association.
- The Juniper Fund raises money to support families and communities impacted by the loss of Himalayan high-altitude workers.
What’s included in the cost of a guided climb of Mount Rainier
The information below is a general guideline. You’ll want to contact each guide service directly to know exactly what their rate includes.

Generally included:
- Entrance fee to Mount Rainier National Park
- Climbing permit
- Professional guides (Each guide service’s climber-to-guide ratio will differ, usually 3 climbers to 1 guide or 2 climbers to 1 guide.)
- Group transportation for itinerary excursions
- Professional instruction in skills required to ascend and descend safely
- Accommodations the evening before summit attempt (tents or hut)
- Climbing ropes
- First aid / safety / emergency equipment
Know your sleeping situation before booking. Listening to people snore while I tried to get the sleep I needed was brutal. If you snore, please bring nasal strips to the bunkhouse.
Generally not included:
- Flight costs to and from SeaTac Airport
- Transportation costs to and from Ashford
- Accommodations in Ashford
- Personal climbing gear and clothing
- Snacks and lunches
- Trip insurance
- Guide tips
May be included:
- Some but not all guide services provide breakfast and dinner at camp.
How long does it take to climb Mount Rainier?
For the average beginner, it takes 5 – 6 hours to hike from Paradise to Camp Muir, 10 – 12 hours to climb from Muir to the summit and back, then 2 1/2 hours to hike down to Paradise from Muir, roughly 19 hours.

Best time for climbing Rainier
Generally, the best weather conditions for Rainier summit attempts happen from end-of-June through August. Poor weather is more likely to turn teams around earlier than this time frame. More crevasses open up later than this time frame, adding difficulty to the route.
July dates are usually the first to fill up when open registration begins for the following season. The second time I booked a guided climb with RMI, I hesitated for 6 minutes to double-check my July availability and ended up having to book an August climb.
Gear Requirements
All required gear can be found on this gear guide.

A LONG-SLEEVED BASELAYER IS A MUST! This Black Diamond sun hoody is durable yet light and airy. Features include UPF 50+ sun protection and a hip pocket with a zipper.
Where to Stay at Mount Rainier
Lodging is required for one or two days on a guided climb, depending on which company you choose.
★ Paradise Village Hotel
I stayed in a cabin at Paradise Village in Ashford and loved eating at the Ukrainian restaurant there. The wait times for dinner can be long, but the food is delicious.
They now have a hot tub that you can reserve.
Is a Mt Rainier Guided Climb Worth It for You?
When climbing with a guide, all you have to do is be in excellent shape and put one foot in front of the other. No decision-making is needed. This is the #1 reason to book with a guide company.
You follow directions and learn from a professional with the skills and knowledge to get you safely up and down the mountain.

But climbing with a guide company means keeping up with the lead’s set pacing. Consider the route, itinerary, pacing requirements, and sleeping accommodations before choosing one.
If you’re concerned about keeping pace within a group setting, a private climb may be better for you.
RELATED POSTS:
➥ 7 BEST Towns Near Mount Rainier for First-Time Visitors
➥ 15 BEST Places to Stay Near Mount Rainier (& Places to Skip!)
➥ National Park Inn Review: Pros, Cons & Why I’d Return
➥ A First-Timer’s Guide to Paradise at Mt Rainier (Hikes & Attractions)
➥ Skyline Loop Trail Guide: 10 Reasons It’s WA’s Best Day Hike
➥ Hike to Camp Muir: Ultimate Guide to Help You Prepare
➥ Ultimate Camp Muir Hike Gear List (I’ve Been There 4 Times!)

Skip the guesswork, stress, and hours of research—let me help you plan your itinerary!