How to Visit Mount Rainier & Plan the Perfect Trip Length

Dreaming of seeing the wildflower meadows at Mount Rainier—but worried you’ll miss peak bloom or waste precious time on the road?
Planning how many days to spend, which entrance to use, and where to focus your time can feel overwhelming, especially if you’ve never been.
As a Washington local who explores the park in every season and helps travelers build custom itineraries, I’ll walk you through exactly when and where to go, how long to stay, and how to avoid the most common planning mistakes—like trying to visit too many areas in too little time.
You’ll also get insider tips on prioritizing Paradise and Sunrise (Mount Rainier’s most iconic areas) so you’re not spending hours driving between them or circling for parking.
First Time Visiting Mount Rainier? What to Know Before You Go
Here are my top Mount Rainier travel tips—the three things I do before every trip.
1. Secure timed entry reservations.
- Timing: Check the NPS site in late winter or early spring for release dates.
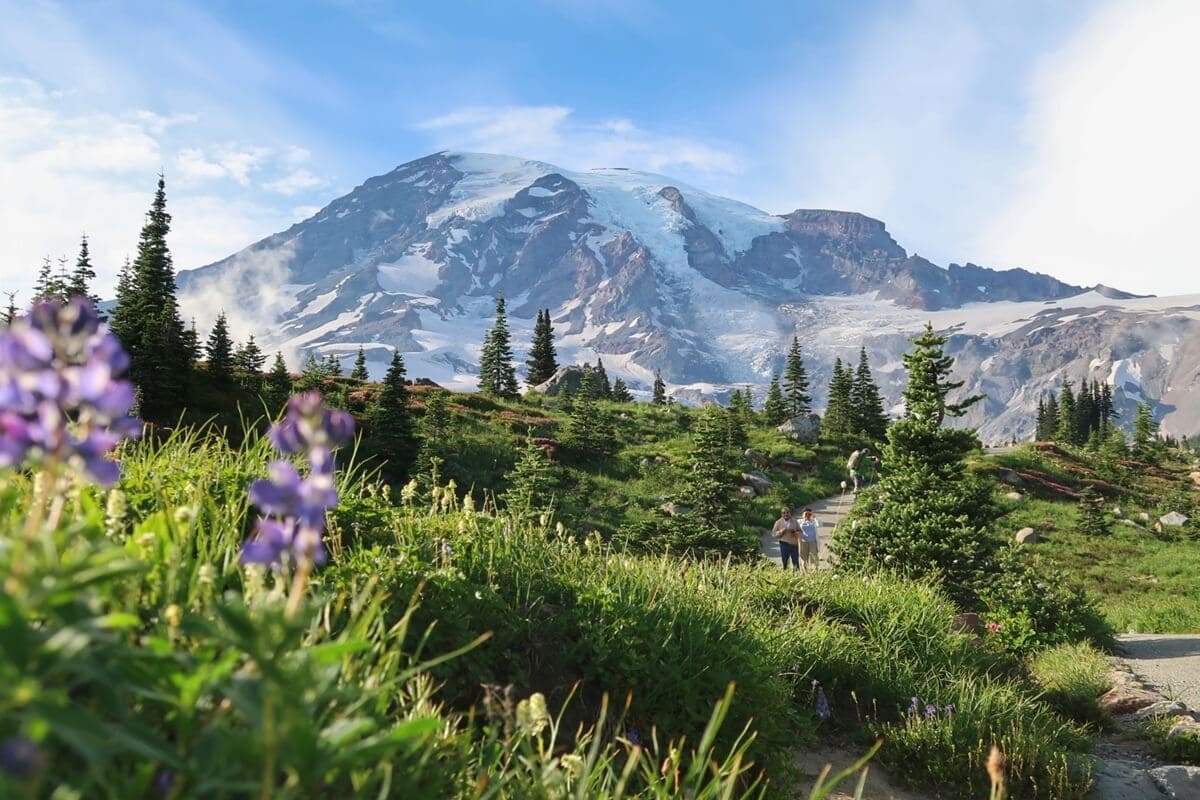
I plan most of my visits from mid-July through August—the best time to see the wildflower meadows in full bloom. I prefer the 7–9am time slot so I can park and start hiking before the crowds arrive.
If you miss out on reservations, don’t worry, I can help you plan an incredible trip. You don’t need a reservation to explore Tipsoo Lake and the nearby Naches Peak Loop Trail in the Sunrise corridor.
2. Check lodging availability early.
- Timing: 6 – 9 months in advance
I browse Booking.com, Expedia, and Hotels.com to compare what’s available. Booking and Expedia feature the best vacation rentals, like the cozy Ashford cabin I stayed in last summer.
Booking early gives you the best chance to snag top accommodations, but I’ve always managed to find somewhere to stay near Mount Rainier, even when booking the same week in July or August.
3. Watch the mountain forecast closely.
- Timing: 1 – 3 days in advance
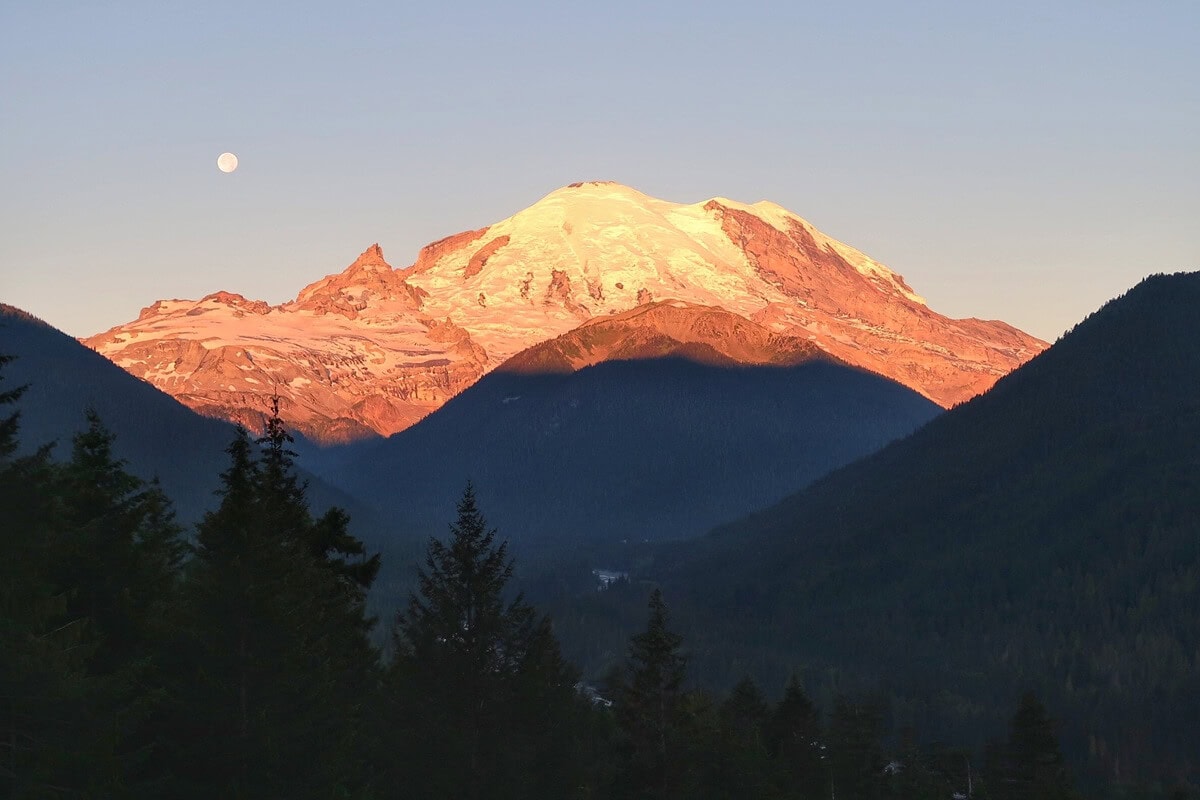
A few days before every trip, I check Mountain-Forecast.com repeatedly to see whether or not “the Mountain will be out.” Seeing Rainier tower over the landscape is what every first-time visitor hopes for.
The site breaks down weather by elevation, which is crucial for higher elevation hikes like Camp Muir, where conditions can change fast.
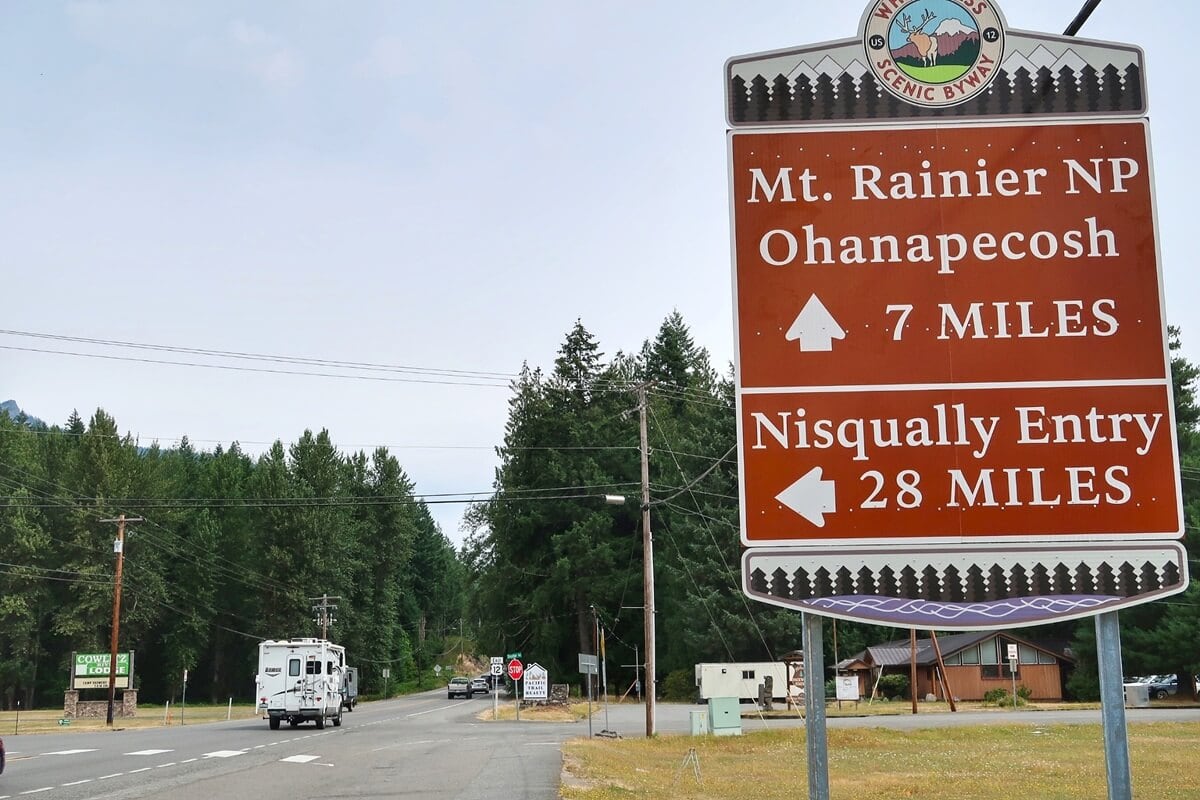
TIP: If the Mountain isn’t out during your trip, head to lower elevation trails in Longmire or Ohanapecosh to see old-growth forests and waterfalls.
Mount Rainier at a Glance
Mount Rainier commands the landscape as the fifth-highest peak in the United States outside of Alaska, rising 14,410 feet above sea level.
As a Washington local, I still feel a sense of awe every time I catch a glimpse of the Mountain, and many locals will tell you the same.
TIP: Figure out which side of the plane to sit on when flying into Seattle-Tacoma (SEA) Airport for the best views of Mount Rainier.
Below is a quick overview for planning your Mount Rainier trip.
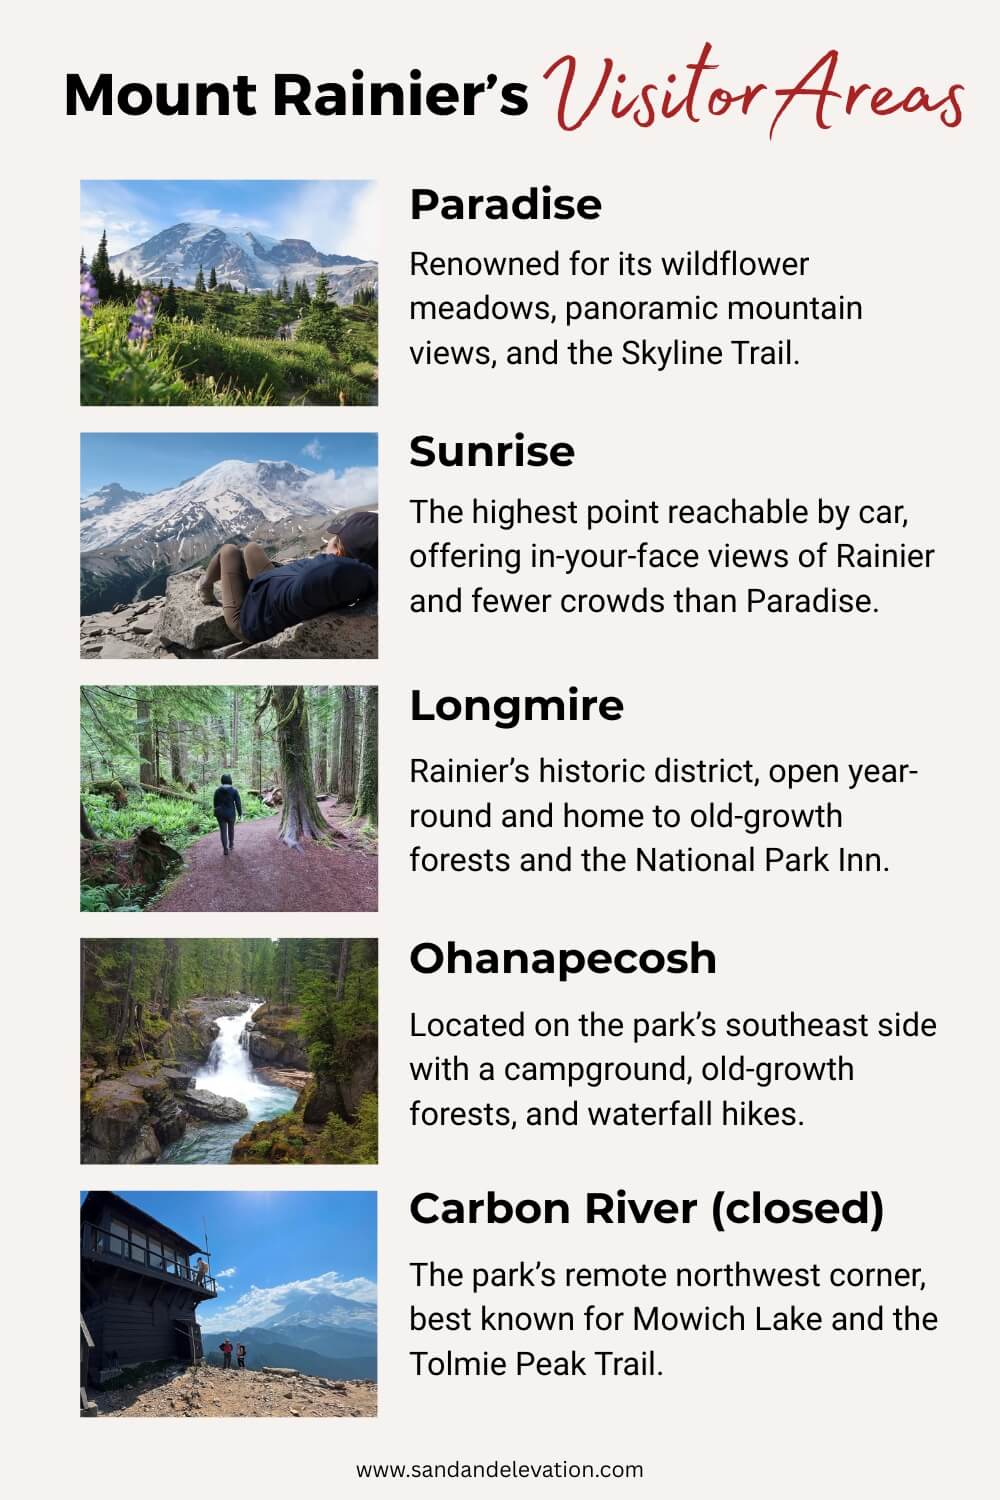
- Visitor Areas: Longmire, Paradise, Ohanapecosh, Sunrise, Carbon River (closed)
- Open Year-Round: Longmire, Paradise (weekends only in winter)
- Best for First-Timers: Paradise
- Best for Accessibility: Paradise is the best area for wheelchair- and stroller-friendly trails.
- Entrances: Nisqually & Stevens Canyon (Paradise & Longmire), White River (Sunrise)
- Passes Required: National Park Pass and timed entry reservations during peak travel months.
- Drive Time from Seattle (closest major city): ~2.5 hours, depending on traffic and destination.
- Cell Service: While I get AT&T cell service near Paradise Inn, it’s limited throughout the park. Download offline maps before you go.
- Road Status: Check the NPS site for road closures and trip alerts to avoid delays.
When to Visit Mount Rainier
The season for hiking Rainier’s subalpine trails is short—typically early July through early October.
I always bring snowshoes in April and May. In June, I come prepared for snow-covered trails at Paradise. Even Reflection Lake, one of the park’s most photographed spots, often stays frozen until mid-July.
Here’s a quick breakdown of the best time to visit Mount Rainier and what to expect each season.
Summer (mid-July to early September)
Trails are mostly snow-free, and all roads are generally open. Long daylight hours make this the best time for first-time visitors to experience the park’s magnificence.
Despite the crowds, this is when most of my trips happen because I’m obsessed with catching wildflowers at peak bloom in the Paradise meadows.
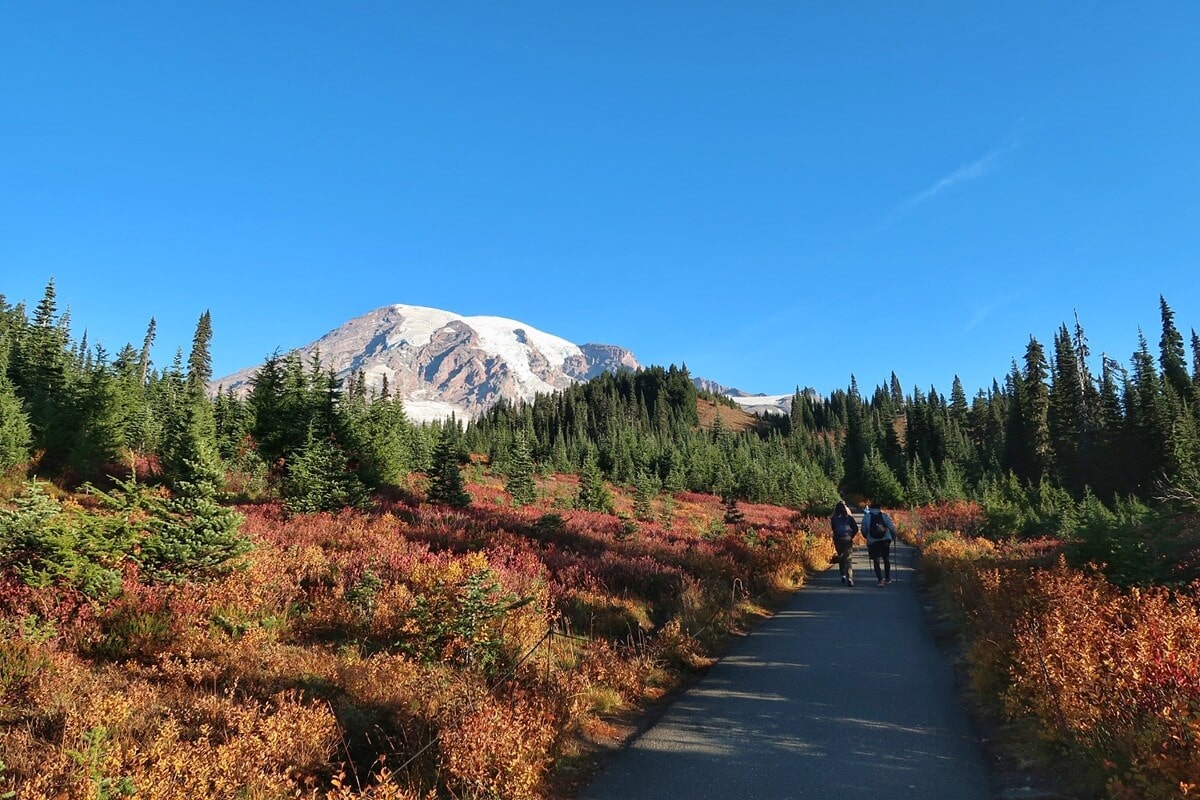
Fall (mid-September to mid-October)
Early fall still feels like summer, but by October, you might see the first dusting of snow on the Mountain. I love visiting Rainier in fall, when the slopes are ablaze in fiery colors and crowds have thinned out.
Pack layers and check road alerts—Sunrise and Stevens Canyon Road usually close for the season by mid-October.
Winter (mid-October through early May)
There’s nothing dreamier than seeing the park blanketed in fresh, fluffy snow.
Paradise becomes a winter wonderland, perfect for weekend snowshoeing trips, while Longmire offers year-round access if the weather cooperates. Be prepared for chain requirements and fast-changing weather conditions.
Spring (May to June)
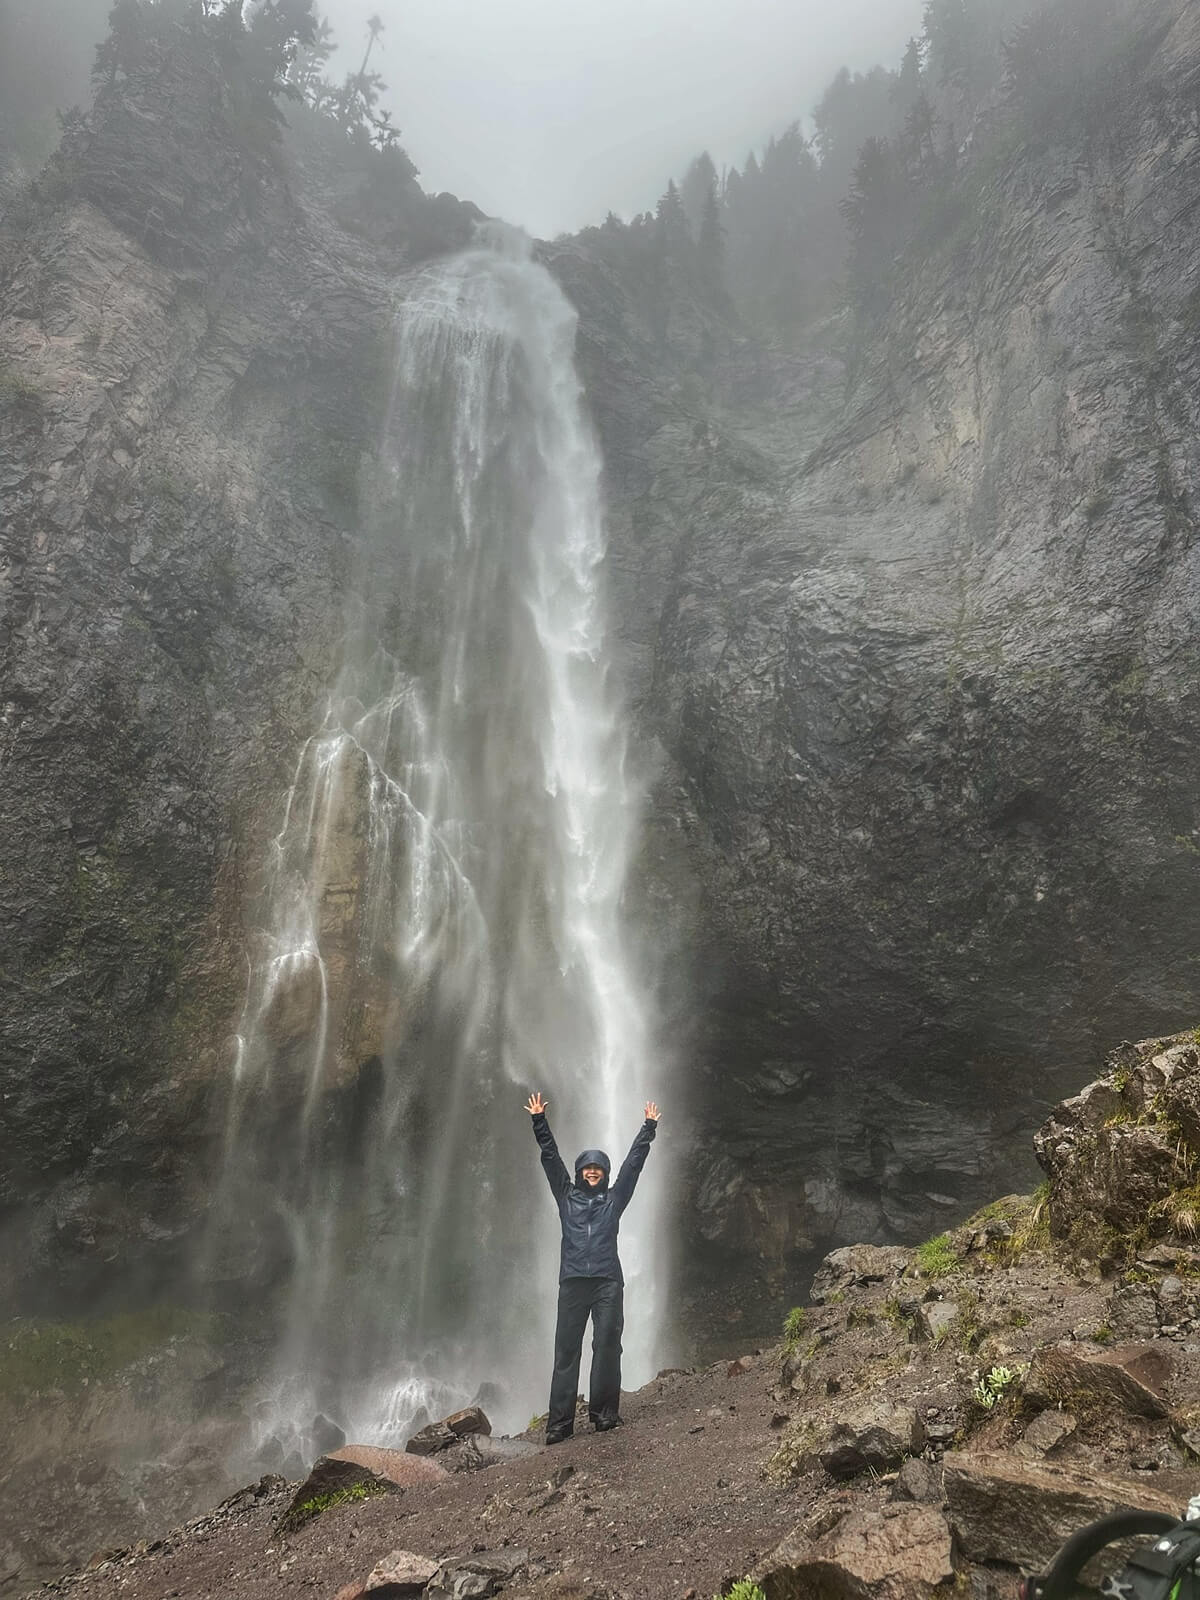
Waterfalls roar to life, and the lower-elevation trails in Longmire and Ohanapecosh feature that vivid green color you only get in spring.
Higher trails are still buried in snow—I’ve used snowshoes on June hikes at Paradise—but it’s a peaceful time to explore before summer crowds arrive.
NOTE: Sunrise doesn’t open until early to mid-July.
Easy Mount Rainier Hikes & Stops
You don’t have to be a serious hiker to enjoy Rainier’s best attractions. Mount Rainier has several paved or gently graded trails that make it accessible to nearly everyone.
In Paradise, my 70-year-old mom (who’s had both knees replaced) walked the Skyline Trail to Myrtle Falls with ease. We also visited Narada Falls and Christine Falls that day after a stop at Inspiration Point.
At Sunrise, we hiked the Silver Forest and Sunrise Nature trails together, both offering gentle grades and jaw-dropping mountain views.
How to Get to Mount Rainier
Mount Rainier doesn’t have a single “main” entrance—how you get there depends on which area of the park you plan to visit and where you’re starting from.
- Drive time from Seattle: ~2.5 hours to Paradise via Nisqually Entrance or Sunrise via White River Entrance
- Drive time from Tacoma: ~1.5 hours via Highway 7 and 706
- Drive time from Portland: ~2.5 hours via I-5 and US 12
If your flight arrives late in the day, stay overnight near Sea-Tac Airport instead of driving the winding mountain roads at night—they’re dark and best navigated in daylight.
How to Get to Mount Rainier from SeaTac Airport
From late May through September, Highways 7 and 706 from the Puyallup/South Tacoma area are the most-traveled route to reach the Nisqually Entrance for Paradise and Longmire.
I usually stop in Elbe to use the restroom or at Whittaker’s Cafe in Ashford to grab a coffee before entering the park.
By early to mid-July, Highway 410 from Enumclaw opens fully to the White River Entrance for Sunrise, the highest point you can drive to in the park (elevation 6,400 feet). Snow often lingers here until early July.
When my hiking partner and I plan to hike both Paradise and Sunrise trails on the same trip, we stay in Packwood, a small town conveniently located between the two areas.
NOTE: The Carbon River Road and Mowich Lake Road (for the park’s northwest corner) are currently closed and inaccessible by vehicle at this time.
Fuel & Food Stops Before Entering the Park
You won’t find gas stations or grocery stores inside Mount Rainier National Park, so fill up in Ashford, Packwood, or Greenwater, the best nearby towns to stay in, on your way in.
I always pack plenty of snacks, lunch, and drinks with me, but when needed, I’ve stopped at the Ashford General Store and Blanton’s Market in Packwood to stock up on supplies.
You can also purchase food at Paradise and Sunrise visitor areas.
Parking at Mount Rainier
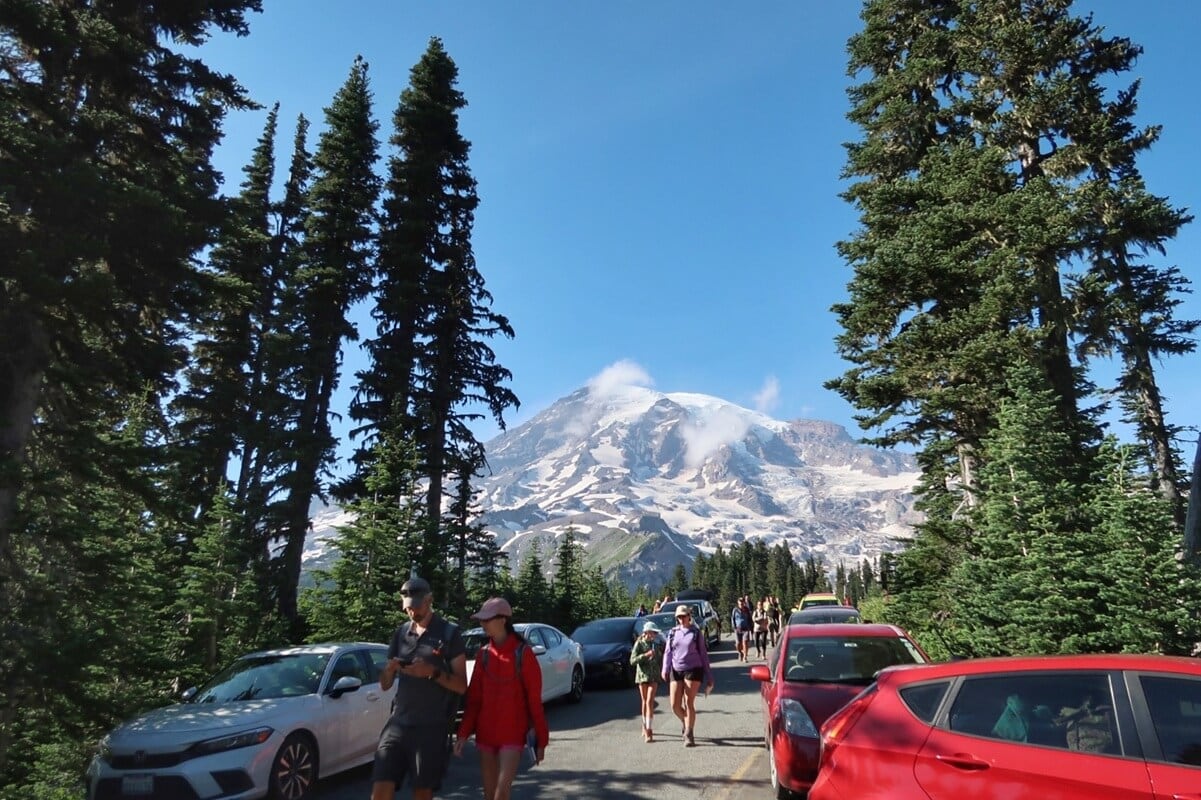
While the early bird usually gets the worm, I like arriving at Paradise, Rainier’s most popular area, around 4pm, as daylight lasts until 9pm. By then, many visitors are heading out, and I can typically find a parking spot quickly without the morning rush.
How early you need to arrive depends on your timed entry reservation. If you don’t have one, plan to reach the entrance before 7am, especially on weekends or clear summer days when parking lots fill up quickly.
Paradise Parking
Before reaching the Henry M. Jackson Visitor Center, you’ll pass the second lower lot on the left. If that lot is filling up, don’t waste time circling the main upper lot, especially if there’s a line of cars behind you—it’s better to park and start your visit.
There’s also a third overflow lot (Paradise Picnic Area), and when all lots are full, cars line Paradise Valley Road.
If you park roadside, please don’t park on sensitive vegetation and wildflowers.
Longmire Parking
If Paradise is overflowing with cars and people, head to Longmire. There’s usually ample parking behind the Longmire Museum, and several great trails nearby, including the Eagle Peak Trail.
When I last hiked Eagle Peak, we reached the saddle to an incredible 360-degree view of Rainier, the Paradise area, Mount Adams, and Mount St Helens—and we had it all to ourselves.
Sunrise Parking
Sunrise sees fewer visitors than Paradise, which means finding a parking spot is usually easier. Even on summer weekends, I’ve often seen open spaces in the early afternoon.
While amenities are limited (there are no sit-down dining options or air-conditioned areas to relax), that’s part of its charm. The focus here is on the mountain views and sub-alpine trails.
Need help with trip planning?
I offer custom itinerary planning services to help you save hours (or days!) of research and plan your trip with confidence.
How Many Days Do You Need at Mount Rainier
I’m a firm believer that you can have a satisfying experience even if you only have one day at Mount Rainier. My sister was filled with joy after spending a single morning and afternoon exploring the park.
That said, two to three days gives you the time to hike longer trails, visit both Paradise and Sunrise, and experience more of Rainier’s diverse landscapes.
If you’re an avid hiker or a photographer hoping to catch wildlife and both sunrises and sunsets, plan for at least four days to make the most of your trip.
Here’s how to visit Mount Rainier in 1, 2, or 3 days, plus itinerary ideas for each.
Is One Day at Mount Rainier Enough?
Absolutely. The number one thing to do at Mount Rainier is hike trails with impressive mountain views, and you can certainly do that in one day.
1 Day — Option to stay in Ashford for an early start in Paradise
In my guide to spending one day at Mount Rainier, I share why you’ll want to focus on just one area. For most first-time visitors, that will be Paradise. I also include a detailed day trip itinerary to help you make the most of your time.
2-Day & 3-Day Mount Rainier Itinerary Ideas
If I were planning a trip for a client who’s reasonably fit and enjoys hiking, I’d recommend three full days (with travel days separate).
Two full days works well for many visitors, but three gives you breathing room to explore both sides of the park without rushing.
2 Days — Stay in Packwood
- Day One: Paradise Visitor Area must-see stops — Muir Steps, Myrtle Falls, Henry M Jackson Visitor Center, Paradise meadows, Reflection Lake, and Narada Falls. Stop in Longmire on your way out, dine at the restaurant in the National Park Inn, and walk the short and historic Trail of the Shadows.
- Day Two: Sunrise Point Overlook, Sunrise Visitor Area, and the Burroughs Mountain Trail for jaw-dropping views.
3 Days — Stay in Packwood
- Day One: Paradise region highlights (same as above), but save Longmire for Day Two and hike the Skyline Trail if conditions allow.
- Day Two: Hike to Comet Falls and explore the Longmire area’s attractions and trails.
- Day Three: Sunrise region highlights (same as above or hike to Berkeley Park for stunning wildflower meadows)
TIP: If you stay in Ashford, expect a nearly two-hour drive to Sunrise. If your trip includes both areas, you’ll need separate Timed Entry Reservations for each day and each entrance.
Reasons to Stay Longer Than 3 Days
Adding an extra day or two can turn a great trip into an unforgettable adventure.
- Backpacking: Trips can last several days to over a week, especially if you’ve secured permits for the Wonderland Trail that circumnavigates the Mountain.
- Exploration: Adding a fourth day allows you to explore less-visited areas, like Ohanapecosh, or take a scenic drive over Chinook Pass, which offers incredible views of Rainier.
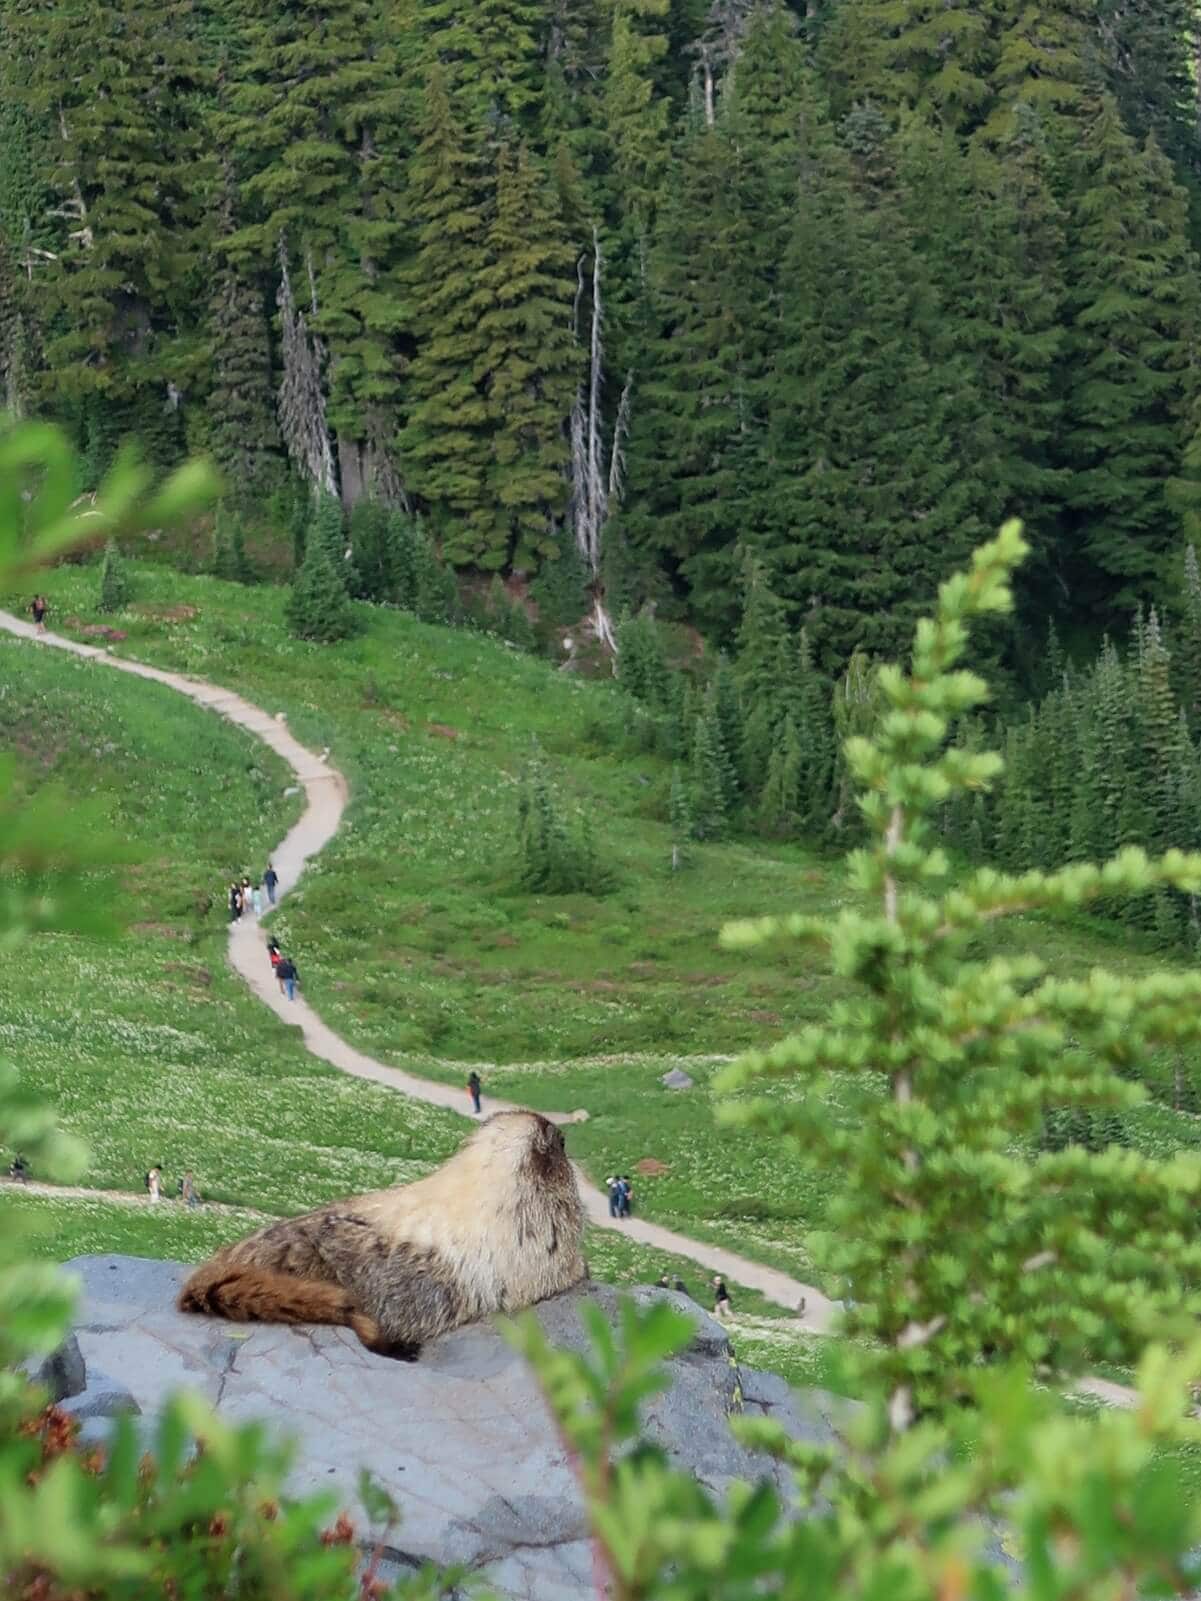
- Photography: Staying longer dramatically increases your chances of photographing wildlife like bears and marmots in the subalpine meadows or catching a clear sunrise.
➥ Want to see more of Washington’s national parks? Check out my guide to the best itineraries for a day trip to Olympic National Park.
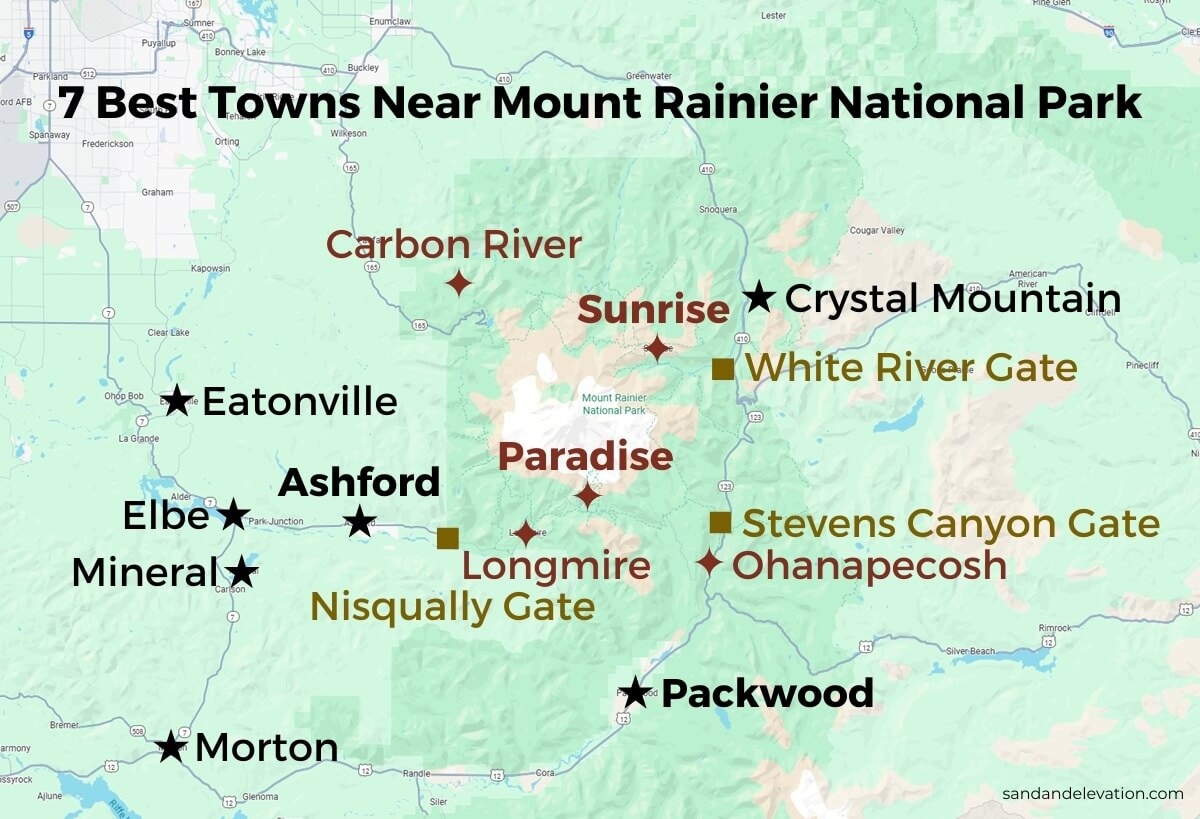
Which Mount Rainier Entrance, Visitor Area & Town Is Best for Your Trip?
Knowing which Mount Rainier entrance leads to which visitor area and which nearby towns make the best home base can save you hours of driving.
My mom and I stayed in Ashford after a day in Paradise and then drove nearly two hours to get to Sunrise the next morning. That trip taught me how important this decision is.
Here’s how to choose the best entrance for your Mount Rainier visit and the right town to stay in.
Nisqually Entrance for Paradise & Longmire — Stay in Ashford
Located on the park’s southwest side, the Nisqually Entrance is the most popular entrance into Mount Rainier National Park. It leads to Paradise, the park’s most iconic visitor area—and Longmire, which is open year-round.
Why this area works: It’s where I take family and friends for the classic Mount Rainier experience with wildflower meadows and waterfalls, and plenty of amenities close by.
Best town: I love staying in Ashford, the small gateway town just outside the entrance, home to surprisingly good restaurants, including my favorite, Wildberry.
Stevens Canyon Entrance for Paradise — Stay in Packwood
Located on the park’s southeast side, the Stevens Canyon Entrance connects to the Paradise area and gets far less congested than the Nisqually Entrance. It’s typically open June through early October, depending on snow.
Why this area works: It’s great for travelers coming from Portland or those who want to explore both Paradise and Sunrise from one base in nearby Packwood.
Best town: Packwood has a vintage mountain-town feel and family-friendly breweries like Packwood Brewing Co.—my go-to for dinner—and Longmire Springs Brewing.
White River Entrance for Sunrise — Stay in Packwood or Crystal Mountain
Located on the park’s east side, the White River Entrance leads to Sunrise. Open from early July through September, this area offers a more relaxed experience and some of Rainier’s best views.
Why this area works: I love the quieter atmosphere here and the chance to watch the Mountain glow pink at sunrise. It’s perfect for those who come to hike and don’t need a lot of amenities.
Where to stay: Stay near Crystal Mountain, which includes the small, charming town of Greenwater, or in Packwood if you also plan to explore the Paradise side of the park.
Where to Stay at Mount Rainier
Now that you know which entrance connects to each area of the park, here’s a quick list of places I’ve stayed or personally visited in each gateway town.
Ashford Lodging
- Best Overall Hotel: Nisqually Lodge
- Best Cabins: Copper Creek Inn Cabins
- Best B&B: Mountain Meadows Inn
Packwood Lodging
- Best Overall Hotel: Historic Hotel Packwood
- Best Cabins: Packwood Lodge & Cabins
- Best Lodge: Mountain View Lodge
Crystal Mountain Lodging
- Best Overall Hotel: Crystal Mountain Hotels
- Best Cabins: LOGE Alta Crystal
- Best Vacation Rental: Elk Crossing Cozy Cabin
Campgrounds Inside Mount Rainier National Park
- Near Nisqually Entrance: Cougar Rock Campground
- Near White River Entrance: White River Campground
- Near Stevens Canyon Entrance: Ohanapecosh Campground
Want my full list? Check out my guide on where to stay near Mount Rainier for more accommodations and camping options.
How to Avoid Crowds at Mount Rainier: 5 Insider Tips
Here are five insider tips to help you avoid and manage crowds at Mount Rainier.
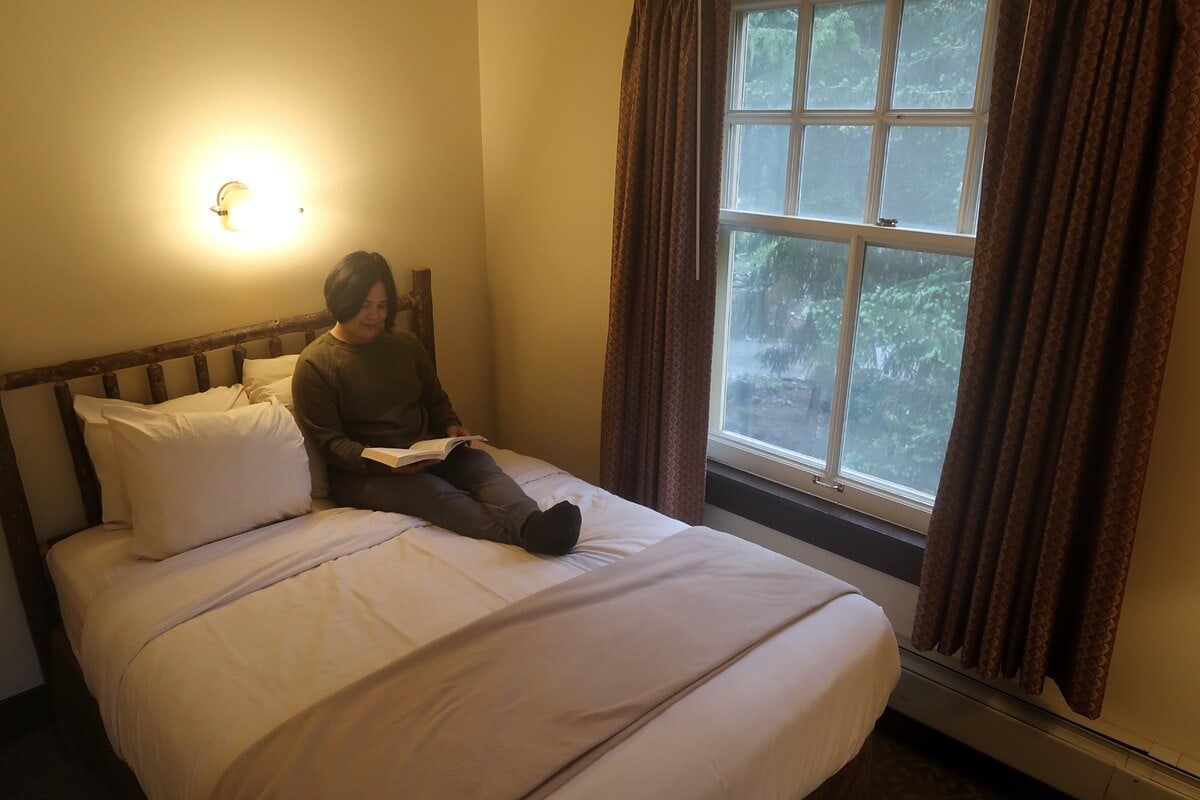
- Book accommodations inside the park. I’ve stayed at the National Park Inn in Longmire twice, and it’s always a relief knowing I don’t have to wait in any lines at the Nisqually Entrance each morning.
- Visit Monday – Thursday in summer. Weekends are far busier than weekdays, especially in July and August.
- Plan late afternoon and evening visits. Take advantage of long summer days—there’s still plenty of light for hiking and photography until 9pm.
- Choose lesser-traveled trails. I hiked Paradise’s Alta Vista Trail in complete solitude while crowds packed the Skyline Trail. The same goes for the Moraine Trail, where I passed only one other group on a Sunday morning in late July.
- Visit during shoulder seasons. Skip the summer crowds and plan your trip for mid-September when the weather is usually pleasant but visitor numbers drop dramatically.
I share even more helpful tips in my full post on avoiding crowds at Mount Rainier.

Mount Rainier Packing List (Late Spring to Early Fall Adventures)
If you’re wondering what to pack for Mount Rainier, my list below is a solid starting point for planning your trip.
- Long Sleeve Shirt: Wear a breathable, moisture-wicking shirt that provides sun protection and saves you from constant sunscreen reapplication.
- Softshell Jacket: My go-to item that’s always in my pack for cool mornings, evenings, or when the wind picks up at higher elevations. It offers warmth without bulk and layers easily.
- Rain Jacket: A waterproof layer is essential, even in June. You might leave it in the car in July or August, but rain showers can happen any time of year.
- Sunhat: I prefer a lightweight, quick-drying running-style hat, but anything that shields your face and neck works great on exposed trails.
- Sunglasses: Bring polarized ones, if possible, especially if you’re hiking near snowfields.
- Sturdy Shoes: Choose broken-in boots or trail runners with solid grip for Rainier’s rocky, uneven terrain.
- Backpack: A lightweight pack with a hip belt makes it easy to carry snacks, water, and extra layers without straining your shoulders.
- Hydration Bladder: I always carry at least 3L of water when day hiking in summer.
- Trekking Poles: Reduce strain on your knees and maintain stability on steep ascents and descents. You won’t catch me on the trail without them!
Prepare for Unpredictable Weather
Conditions can change fast at Rainier, especially during shoulder seasons. I’ve hiked through sunshine, wind, and thick fog all in a single day. Always bring your Ten Essentials, especially on longer hikes.
Ready to Plan Your Trip?
Want help planning your trip to Mount Rainier? I offer one-on-one trip consultations and itinerary planning services to help you maximize the time and money you spend on this trip.
Or grab my free Rainier trip planner here.
RELATED TRIP PLANNING POSTS:
➥ How to Visit Mount Rainier & Plan the Perfect Trip Length
➥ Best Time to Visit Mount Rainier: A Seasonal Guide
➥ 17 BEST Things to Do at Mount Rainier (Non-Hikers Too!)
➥ 7 BEST Towns Near Mount Rainier for First-Time Visitors
➥ 15 BEST Places to Stay Near Mount Rainier (& Places to Skip!)
➥ National Park Inn Review: Pros, Cons & Why I’d Return
➥ A First-Timer’s Guide to Paradise at Mt Rainier (Hikes & Attractions)
➥ Mount Rainier 1-Day Itinerary (Best Hikes & Stops)
➥ Skyline Loop Trail Guide: 10 Reasons It’s WA’s Best Day Hike
➥ 10 Tips to Avoid Crowds at Mount Rainier in Peak Season

Skip the guesswork, stress, and hours of research—let me help you plan your itinerary!