Ultimate Camp Muir Hike Gear List (I’ve Been There 4 Times!)

If you’re looking for a complete gear list for day hiking to Camp Muir, here’s everything I needed for this adventure.
I’ve attempted it five times and completed it four times. On my first trip, I brought things I didn’t need, like my camping chair.
Because I’m a bit of a gear nerd and always read trip reports beforehand, I had everything I needed for the hike.
Some might look at this list and call it overkill—but I’m a “ten essentials” evangelist, and I know from experience that the Camp Muir hike is one to take seriously.
This gear list covers everything you’ll need to stay safe, including footwear, apparel, hiking essentials, and a few smart extras.
Let’s get ready!
Camp Muir Hike Checklist at a Glance
My complete checklist is below.
Optional items to bring during July and August when the forecast is optimal are indicated by an asterisk.* These items are essential if the weather is questionable.
Everything else on this list is mandatory to prepare you for the unexpected.
NOTE: This is a complete list for day hikers, but not for those on a Mt Rainier guided summit climb. Additional mountaineering gear is needed for summit attempts.

What to Bring When Hiking to Camp Muir

Below is a list of things I wore and brought on my Camp Muir day hikes in July and August. These months are when conditions and weather are the most reliable for a safe adventure.
I also did this hike in May when the alpine landscape was still wintery. I include a section at the end on what to bring if you do this hike during the shoulder seasons.
A NOTE ON COST:
Good gear is an investment that pays dividends in comfort, reliability, and durability. I firmly believe that cheap gear is more expensive because you end up replacing it, which means you buy the same item twice.
If you remember only one tip from this post, let it be this: Never be cheap when buying hiking boots or rain gear!
All it takes is one longer-than-expected hike in lousy weather, and you’ll thank yourself.

RELATED POST: Prepare for Hiking to Camp Muir
Backpack
A backpack with hip belts will help distribute your pack’s weight.
The first time I did this hike, I brought my 22L Osprey. It was the only pack I had at the time. It was comfortable and sufficient.
Now that I have a 40L REI pack, I’d choose that one over the 22L, even though that means I’d carry more weight.
The extra room allows me to fill my 3L bladder completely and have enough space to fit everything below and a few “nice to have” items, like chips that won’t get smushed.

Footwear
Moisture-wicking socks
Comfortable feet make or break the enjoyment of a hike, and socks play a huge part.
Wrightsocks use “2-layer construction,” effectively managing sweat and external moisture. These combined layers also absorb friction to prevent blisters.
I own seven pairs of these socks. Yes, seven!
Somehow, they don’t stink, even on adventures when I wear them two days in a row.
The one downside is that they wear out fairly quickly, even if you hand wash them, like I do. When that happens, I use them as an everyday sock instead of a hiking sock.

Waterproof hiking boots
Waterproof hiking boots provide the sturdiness you need on the rocky parts of the trail and protection from the cold and wet snow once you get on the Muir snowfield.
I’ve never gotten a blister wearing my Oboz and Wrightsocks. Not even after twenty miles of hiking on the Enchantments thru-hike in one day.
I’ve often wondered what has helped me remain blister-free: the socks, boots, or the combination of the two?
I own two pairs of these boots. (Are you seeing a trend here?)

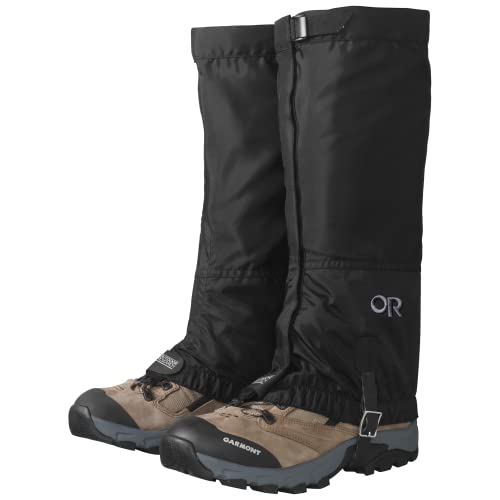
Gaiters
Wearing gaiters over your pants and boots prevents snow and debris from getting into your boots.
Despite completing this hike twice, I forgot to bring gaiters on my third attempt. This was a careless mistake that wrecked my trip.
My boots and socks were completely soaked, my feet were cold, and it was May when the entire hike was on snow.
If temperatures drop low enough, cold, wet feet can be dangerous.
Bring gaiters even in summer. Even if they never come out of your backpack on the way up, put them on before glissading.
Microspikes
Microspikes provide traction when hiking the snow-covered sections of this trail, minimizing the risks of slips and falls.
They were easy to put on when sitting on uneven terrain after crossing Pebble Creek.
Kahtoola microspikes are durable and a size small fits my size 7 boot perfectly.
You’ll probably read trip reports of people saying they did this hike in their sneakers. I have to wonder how much energy it took them to prevent falls.
Apparel
Sun hoodie
A sun hoodie is a game-changer on this hike. You get efficient protection against intense sun exposure at higher altitudes.
By covering your arms and neck, you don’t have to deal with the hassle of frequent sunscreen reapplications.
I love Patagonia’s Capilene Cool apparel for its temperature-regulating feature. I wore their sun hoodie on my first trip.
As soon as I felt the sun hit the side of my face, I’d throw the hood up over my head and sunhat.

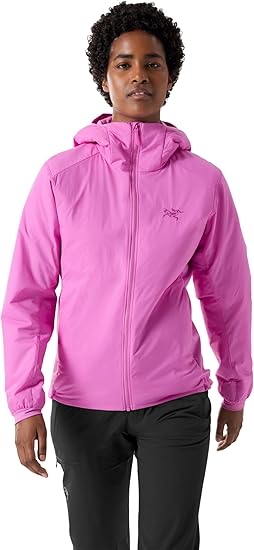
Softshell pants
Softshell pants are the superior choice when recreating outdoors. They’ll dry much quicker than cotton or denim if they get wet.
The fabric usually has a lot of give. You can lift your legs high to climb over things when needed, and they don’t get weirdly stretched out.
My Arc’teryx leggings are great on this hike.
They breathe well, helping to regulate my body temperature. They’re surprisingly durable when I brush up against rock. And I can easily layer my hardshell pants on top of them.

Hardshell pants
Snow and freezing temperatures have occurred during July and August. Hardshell pants (rain pants) offer an extra layer of warmth and protection if it starts to rain or snow.
They’re lightweight and easy to fold and keep at the bottom of your pack.
I pulled mine out to use when I glissaded down the mountain.
I’m 5’1”, so these Marmot pants are perfect for me because they come in “short.” They also come in “tall.”

Midlayer top
This layer is essential.
Choose a midlayer made of breathable fabric so you stay warm while moving without trapping your sweat. Otherwise, you risk overheating.
The temperature dropped noticeably once I got to Camp Muir, so I pulled my softshell zip-up hoody jacket from my pack.
This zip-up hoody keeps me surprisingly warm despite being lightweight. It’s on the pricier side, but it performs well in light rain, brutal winds, and cold temperatures, and I expect it will last for years.
Insulated jacket *
If the forecast is stellar, this is a “just in case” item you can probably leave in the car.
Mount Rainier is notorious for quickly changing weather, and an insulated jacket will keep you warm and safe during sudden temperature drops.
To be transparent, I did not bring a down jacket the first time I did this hike. But I probably would have if I had more space in my 22L pack.
In summer, a lightweight insulation jacket like this one is sufficient.

Hardshell jacket
It’s Washington, after all! And it’s wise to keep a hardshell jacket (rain jacket) in your pack when hiking in the Pacific Northwest. Gore-tex is the highest quality material choice.
In late July, I layered my softshell jacket on top of my sun hoody and my rain jacket on top of that.
I stayed warm when it got windy despite not having an insulated jacket.

Headwear
Sunhat
The hike at Paradise begins at 5,420 feet and ends at 10,188 feet. Sun protection is essential because UV rays are stronger at higher elevations.
I recommend wearing a wide-brimmed hat to shield your face and neck if you don’t wear a sun hoodie.
If you wear a sun hoodie, you’ll be fine wearing a traditional sunhat.
I like this sunhat because it’s lightweight and breathable. I own two!

Sunglasses
Sunglasses are a must-bring item to protect your eyes from the intense glare off of the snow.
A good pair of UV-protective sunglasses prevents discomfort and potential eye damage and enhances visibility.
I bought this pair for my summit climbs of Mount Rainier, but my everyday Ray Ban sunglasses were good enough on the hike to Muir.

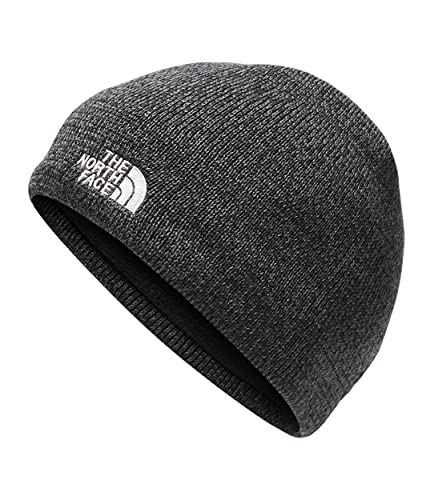
Beanie
This is another “just in case” item. But beanies are so small you have no excuse to not bring one.
My sun hoodie and softshell jacket have hoods, so I layer my head with my sunhat and two hoods. I still bring a beanie to be better prepared for unexpected changing weather.
Since a significant amount of body heat can be lost through your head, bring one in case the weather turns.
Accessories
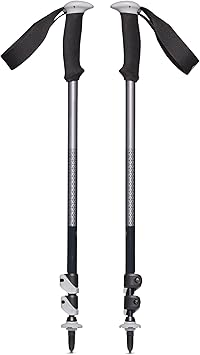
Trekking poles
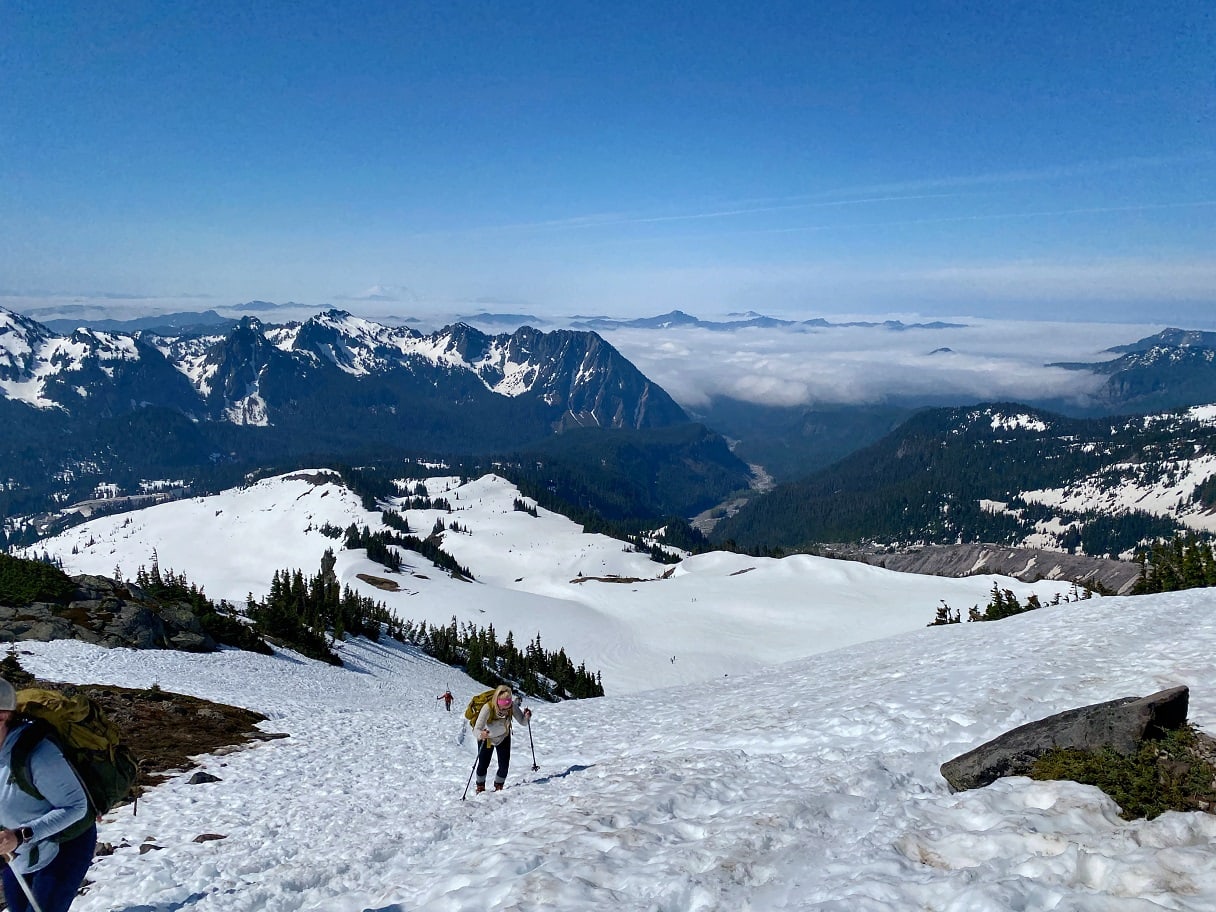
The Camp Muir hike features mixed terrain. You’ll hike on rock and gravel before Pebble Creek and snow after Pebble Creek.
Trekking poles provide stability on uneven terrain and slippery snow and reduce the strain on your knees, especially on the descent.
For me, they’re mandatory on every hike. Poles increase my confidence on challenging sections, allowing me to move faster.
They help tremendously on long descents when the risk of falling or slipping is higher because you’re tired.
Gloves *
I like to protect the back of my hands from sun exposure and shield my hands from rough edges if I have to grip rock.
Gloves may be optional to some, but if you get lost and find yourself on the trail for longer than anticipated, you’ll be glad to put them on if temperatures drop.
I’ve gone through two pairs of these sun gloves. Like the socks on this list, they tend to wear out quicker than anticipated, even though I hand wash them.
But they’re the perfect weight and thickness for me, and I appreciate the suede padding.

Neck gaiter *
Neck gaiters are incredibly versatile. They offer protection against wind, cold, and sun.
They can be adjusted to cover your neck, face, ears, or forehead to prevent sweat from dripping.
I use mine to cover my face when the wind is unbearable. I also use my neck gaiter as a backup rag.
It’s lightweight, compact, and handy in many different situations, making it a no-brainer to add to your pack.

Food & Water
Bring enough food to eat a snack every hour to an hour and a half while you hike.
Plan for a 10-hour adventure, but bring enough food for a 14-hour adventure. A variety of sweet and salty foods is best.
My go-to snacks on the trail are GoMacro bars, Clif Bloks, and Haribo sour gummy bears.
Bring at least 3L of water and electrolytes.
There are places on the snowfield where you can fill up your water but always use a filter.

Navigation
I have an AllTrails+ subscription, and it’s served me well. I download the map to the app on my phone to navigate the trail, even if I don’t have cell service.
AllTrails+ offers a 7-day free trial.
My hiking partner uses Gaia GPS, so between the two of us, we’re set on trail.
But we still bring paper maps and trip reports on challenging hikes.
Because I rely on my cell phone for navigation, I always bring my Goal Zero charger when I hike.

TIP: Put your phone in Airplane mode at the start of the hike to extend the life of your charge.
Misc
Bring toilet paper for the toilets at Camp Muir. And be prepared for the stench!
If you don’t want to risk damaging your rain pants while glissading, bring garbage bags to sit on.
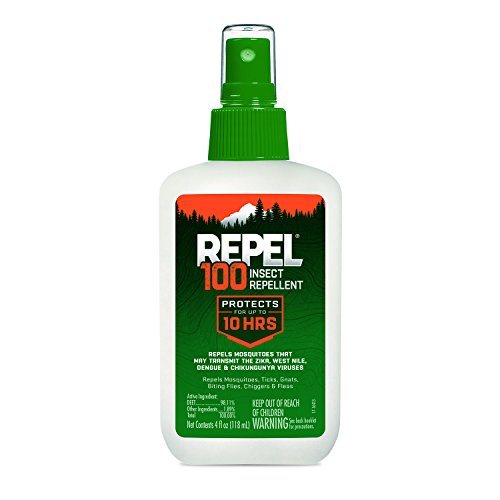
Also, bring bug spray. Bugs were a surprising nuisance on the snowfield in July.
Ten Essentials
Lost hikers in bad weather have died between Paradise and Camp Muir.
The items on the “ten essentials” list are essential to the survival of anyone in a dangerous situation.
Bring a headlamp, a first aid kit including Moleskin, a knife, matches or a lighter, shelter, extra food, water, and clothing.
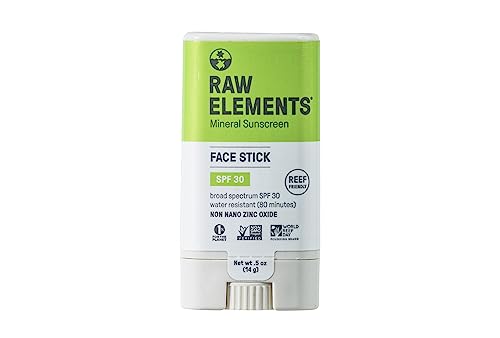
NOTE: Sunscreen is critical on this hike! Re-apply often, especially to parts of the face vulnerable to snow glare, like the underside of your nose and chin.
Gear for Camp Muir During Shoulder Seasons
Conditions change yearly but expect snow on the entire trail in May.
I rented snowshoes from REI. I strapped them to the back of my pack, and the setup was pretty bulky.
I put them on while ascending, probably earlier than I needed to. They’re heavy and a pain in the a**, but I despise post-holing.
I haven’t done this hike in September or October, but I’ve read trip reports of people advising hikers to bring snowshoes during these months.
I highly recommend bringing a satellite communication device during the shoulder seasons. (I carry one with me year-round.)
If the weather quickly changes, navigation becomes more difficult. Knowing you can call for help in a bad situation brings peace of mind.

Wrap-Up: Camp Muir Hike Gear List
This ultimate gear list for the hike to Camp Muir is the only one you need.
Between this complete list and reading trip reports to learn what gear other hikers were glad to have with them, you’ll know exactly what to bring for a successful and safe trip.
👉 Dreaming of summitting Rainier? Check out my experience climbing Mt Rainier with RMI.

Skip the guesswork, stress, and hours of research—let me help you plan your itinerary!